Raindog’s Rampage 2018 Tournament Report
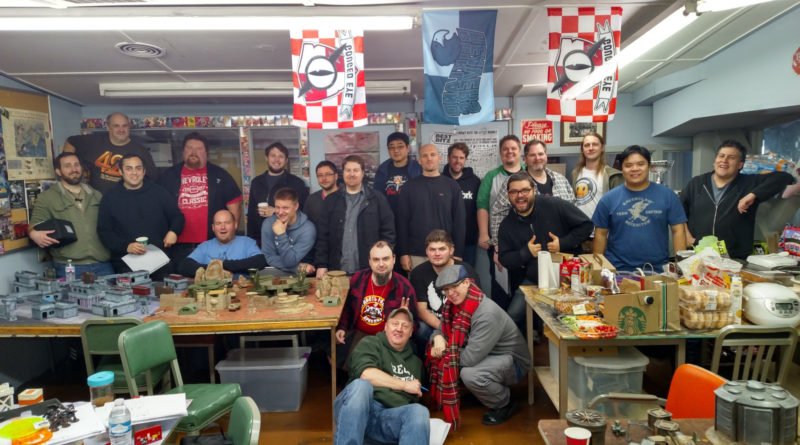
Every year, Eric runs “Raindog’s Rampage,” which is a charity tournament to support a local initiative. This year it was a local women’s shelter, and he collected food, supplies, and money for the shelter. We ended up getting a few carloads of donations of food and other supplies and a few hundred bucks for the shelter. We played four rounds of custom scenarios developed by Eric and generally had a grand old time. A huge thanks to Eric and the Ordo Fanaticus club for organizing and hosting a great day of gaming!
I had a really tough time deciding what to bring to the tournament, so I just rolled up two random lists on the Random List Generator. To make things sane, I ignored all lists that weren’t 10 orders, and then I allowed myself to swap two of the 10 models in the list to fix lieutenant options, make a legal fireteam, or in the case of one of my lists, downgrade something to a cheaper version to upgrade a Warcor to a Keisotsu to get a regular order. I did, however, manually build my 12 exp Spec-Ops, as Eric let us use Spec Ops for this tournament. There also weren’t objective points this tournament–Eric had a big list of point-generating things like bringing food for the potluck lunch, donations, fully painted armies, and a long list of in-game achievements:
- Break a fire team link.
- Complete a turn without a model wounded.
- Coup de Grace an unconscious model.
- Crit a crit.
- Discover a camo marker or an impersonator.
- Dodge a Mine, Mad Trap, Drop Bear, or Crazy Koala.
- Fail a re-roll, after a command token is used.
- Get Tabled.
- Have a Light Infantry kill a model worth at least three times its own value.
- Have model in the opposing deployment zone at the end of the game.
- Have your Spec OP die in every game.
- Have your Spec Op live in every game.
- Heal a model with a doctor or paramedic.
- Immobilize or Isolate an opposing model.
- Kill a friendly model with a doctor or paramedic
- Kill a hacker with a hacker.
- Kill an opposing model in close combat.
- Kill a model that is in suppressive fire.
- Kill an alien (depending on force played).
- Kill an opposing Lt.
- Kill an opposing model in ARO .
- Kill a religious troop
- Kill the enemy Spec-Op.
- Kill three models with one hit.
- Kill a TO model without using a MSV.
- Lay a mine, drop bear, or repeater.
- Successfully Flash Pulse an opponent.
- Lose more models in the active phase, than your opponent.
- Make Three armor rolls on the same model in one turn and have the model live.
- Place three enemy models into the null state with one order.
- Repair a remote or TAG with an Engineer.
- Scavenge a model
- Spotlight or Forward Observe an opposing model.
- Stay out of retreat due to the baggage rule.
- Successfully Dodge Engage.
- Successfully throw any type of grenade, place a repeater, set Crazy Koalas, or D-Charges.
- Successfully change facing as a dodge.
- Use supportware or hack through a repeater.
- Win a Face to Face roll with a penalty of -9 or greater.
- Win a game with a single model remaining.
In any case, this tournament was all about fun and supporting the shelter, and not about winning games. In fact, most of the other things gave more points than a win did. Here’s the pile of all the stuff Eric managed to collect ofr the shelter!
Without further ado, on to the games!
Game 1 – Overpowered Shotgun Striker
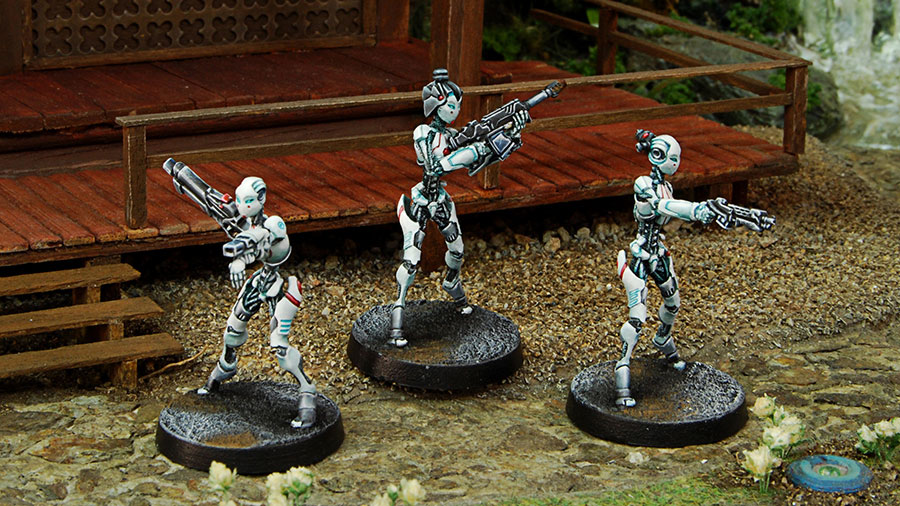 Eric started things off by splitting us into our respective metas and let us issue challenges, so I challenged Gunnar from Eugene, who I’ve only played twice.
Overview
- Mission: Get Inside!
- No model may start the game in a building.
- All buildings are infinitely high.
- It takes a short order to open a door. If a door is opened, all doors are opened for that building are open unless the Lockpicker hacking program is used. If a short order is used to shut a door, all doors for that building are closed.
- The person with the most models in buildings outside their deployment zone wins! If there is a tie, the models in a building farthest from their deployment zone wins.
- Forces: Japanese Secessionist Army versus Operational Subsection of the SSS (200)
- Deploy First: JSA
- First Turn: JSA
[img]https://assets.infinitythegame.net/infinityarmy/img/_logosweb/logo_903.png[/img][b] Raindog A[/b]
[img]https://assets.infinitythegame.net/infinityarmy/img/_logosweb/903/logo_1.png[/img] [b]KEISOTSU Lieutenant[/b] Combi Rifle / Pistol, Knife. (1 | [b]9[/b])
[img]https://assets.infinitythegame.net/infinityarmy/img/_logosweb/903/logo_1.png[/img] [b]KEISOTSU[/b] HMG / Pistol, Knife. (1 | [b]17[/b])
[img]https://assets.infinitythegame.net/infinityarmy/img/_logosweb/903/logo_1.png[/img] [b]KEISOTSU Paramedic (MediKit)[/b] Combi Rifle / Pistol, Knife. (0 | [b]11[/b])
[img]https://assets.infinitythegame.net/infinityarmy/img/_logosweb/903/logo_1.png[/img] [b]KEISOTSU[/b] Missile Launcher / Pistol, Knife. (1.5 | [b]14[/b])
[img]https://assets.infinitythegame.net/infinityarmy/img/_logosweb/903/logo_5.png[/img] [b]DOMARU[/b] Chain Rifle, E/M Grenades / Pistol, E/M CCW, Shock CC Weapon. (0 | [b]26[/b])
[img]https://assets.infinitythegame.net/infinityarmy/img/_logosweb/903/logo_2.png[/img] [b]KEMPEI (Chain of Command)[/b] Combi Rifle / Pistol, CCW, Electric Pulse. (0 | [b]22[/b])[img]https://assets.infinitythegame.net/infinityarmy/img/_logosweb/903/logo_7.png[/img] [b]KARAKURI[/b] Heavy Shotgun, Chain Rifle, D.E.P. / Pistol, Knife. (0 | [b]35[/b])
[img]https://assets.infinitythegame.net/infinityarmy/img/_logosweb/903/logo_7.png[/img] [b]KARAKURI[/b] Combi Rifle, Chain Rifle, D.E.P. / Pistol, Knife. (0 | [b]35[/b])
[img]https://assets.infinitythegame.net/infinityarmy/img/_logosweb/903/logo_1000.png[/img] [b]KAIZOKU Spec-Ops (12 XP)[/b] [i](Infiltration, Minelayer, Engineer)[/i] Combi Rifle / Pistol, Knife. (0 | [b]9[/b])
[img]https://assets.infinitythegame.net/infinityarmy/img/_logosweb/903/logo_29.png[/img] [b]YOJIMBO[/b] Contender, Nanopulser, Smoke Grenades, CrazyKoalas (2) / Pistol, DA CCW. (0 | [b]21[/b])
[img]https://assets.infinitythegame.net/infinityarmy/img/logos/orden_regular.png[/img]9 [img]https://assets.infinitythegame.net/infinityarmy/img/logos/orden_irregular.png[/img]1 [img]https://assets.infinitythegame.net/infinityarmy/img/logos/orden_impetuosa.png[/img]1 [b]| 3.5 SWC | 199 Points |[/b] Open in Infinity Army
[img]https://assets.infinitythegame.net/infinityarmy/img/_logosweb/logo_703.png[/img][b] Operations Subsection of the S.S.S.[/b]
[img]https://assets.infinitythegame.net/infinityarmy/img/_logosweb/703/logo_3.png[/img] [b]DEVA Lieutenant[/b] Combi Rifle, Nanopulser / Pistol, Knife. (0 | [b]23[/b])
[img]https://assets.infinitythegame.net/infinityarmy/img/_logosweb/703/logo_23.png[/img] [b]CSU (Specialist Operative)[/b] Rifle + Light Shotgun, Nanopulser / Pistol, Knife. (0 | [b]12[/b])
[img]https://assets.infinitythegame.net/infinityarmy/img/_logosweb/703/logo_1.png[/img] [b]DAKINI Tacbot[/b] HMG / Electric Pulse. (1 | [b]21[/b])
[img]https://assets.infinitythegame.net/infinityarmy/img/_logosweb/703/logo_1.png[/img] [b]DAKINI Tacbot Paramedic (MediKit)[/b] Combi Rifle / Electric Pulse. (0 | [b]15[/b])
[img]https://assets.infinitythegame.net/infinityarmy/img/_logosweb/703/logo_1.png[/img] [b]DAKINI Tacbot[/b] Combi Rifle / Electric Pulse. (0 | [b]13[/b])[img]https://assets.infinitythegame.net/infinityarmy/img/_logosweb/703/logo_15.png[/img] [b]PROXY Mk.2 Hacker (Assault Hacking Device)[/b] Boarding Shotgun, Nanopulser / Pistol, Knife. (0.5 | [b]21[/b])
[img]https://assets.infinitythegame.net/infinityarmy/img/_logosweb/703/logo_18.png[/img] [b]PROXY Mk.5 (Forward Observer)[/b] 2 Submachine Guns, Nanopulser, E/M Grenades / Pistol, Knife. (0 | [b]10[/b])
[img]https://assets.infinitythegame.net/infinityarmy/img/_logosweb/703/logo_11.png[/img] [b]NAGA (Minelayer)[/b] Boarding Shotgun, Antipersonnel Mines / Pistol, Knife. (0.5 | [b]27[/b])
[img]https://assets.infinitythegame.net/infinityarmy/img/_logosweb/703/logo_11.png[/img] [b]NAGA (Minelayer)[/b] Boarding Shotgun, Antipersonnel Mines / Pistol, Knife. (0.5 | [b]27[/b])
[img]https://assets.infinitythegame.net/infinityarmy/img/_logosweb/703/logo_11.png[/img] [b]NAGA (Minelayer)[/b] Boarding Shotgun, Antipersonnel Mines / Pistol, Knife. (0.5 | [b]27[/b])
[img]https://assets.infinitythegame.net/infinityarmy/img/_logosweb/703/logo_31.png[/img] [b]NETROD[/b] . (0 | [b]4[/b])
[img]https://assets.infinitythegame.net/infinityarmy/img/logos/orden_regular.png[/img]10 [b]| 3 SWC | 200 Points |[/b] Open in Infinity Army
Deployment
We played on my table, and we decided that the infinite height building thing kinda made things really weird with all the bridges and ladders on my table, so we decided to ignore that rule. My table also has no interiors and no doors, so we ruled that ladders are both ladders and doors just to make things easy. I deployed my link in the middle, on a bridge and ready to advance into a building when the coast was clear. I put my Lt on a roof, where I thought he might be safe, and then put my two Karakuri on the flanks. My Kaizoku spec ops infiltrating minelayer went on a bridge in the midfield, and her mine went in the middle of a saturation/low-vis zone to really make things awful for Gunnar.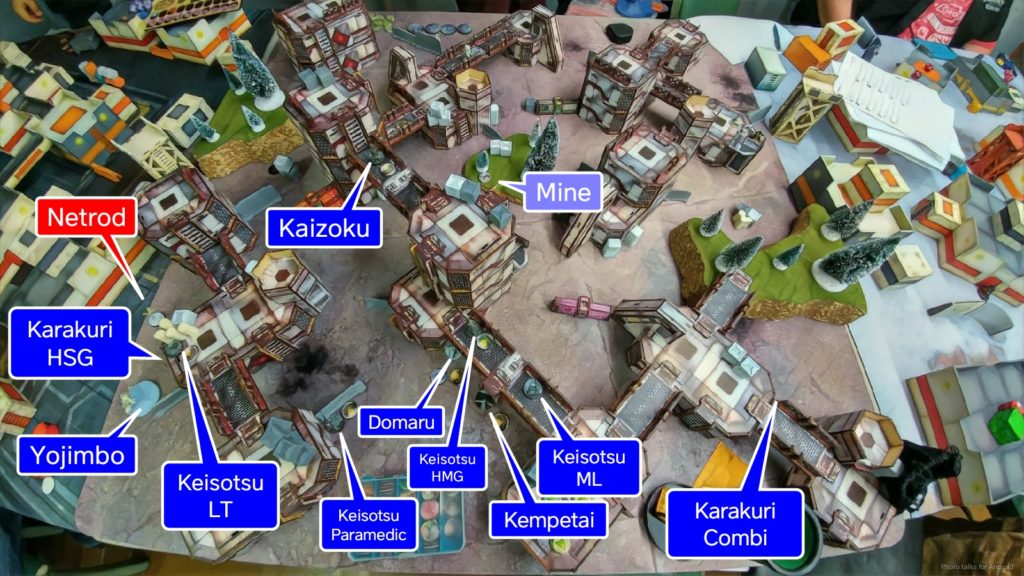 Gunnar did a similar deployment, putting his link in the middle, but deployed more defensively. He brought three Naga minelayers, which was a real nuisance. He put down two of them and held the third in reserve. The first Naga screened the Proxy Mk5 on Gunnar’s left with the other one prone on a bridge to protect The Mk2 went on the same bridge as my Kaizoku, unbeknowst to me.
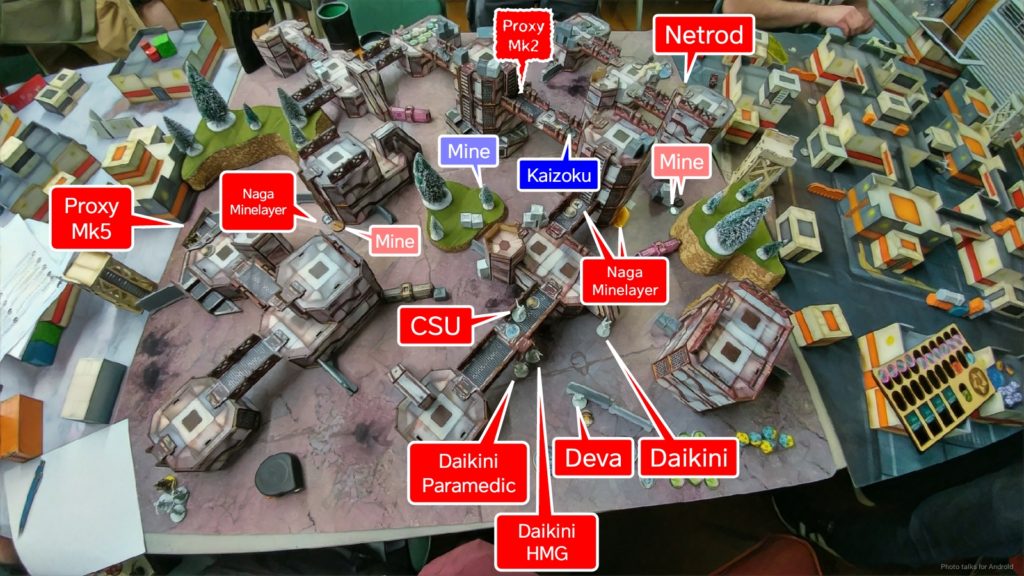 I saw an opening on the left to go after Gunnar’s link, so I put Yojimbo on that side. Gunnar responded by putting down a third Naga Minelayer to block Yojimbo’s advance, doubling up on mines in one location while separating the Naga. Also, his Netrod had conveniently deviated next to Yojimbo and my Karakuri on that side, which was nice easy pickup for me.
Turn 1
Top of 1 – JSA
Yojimbo made his way towards the Daikini link and I dropped a Nanopulsar on the Netrod as he drove by. Of course, Gunnar passed BTS and the Netrod stayed there, taunting Yojimbo.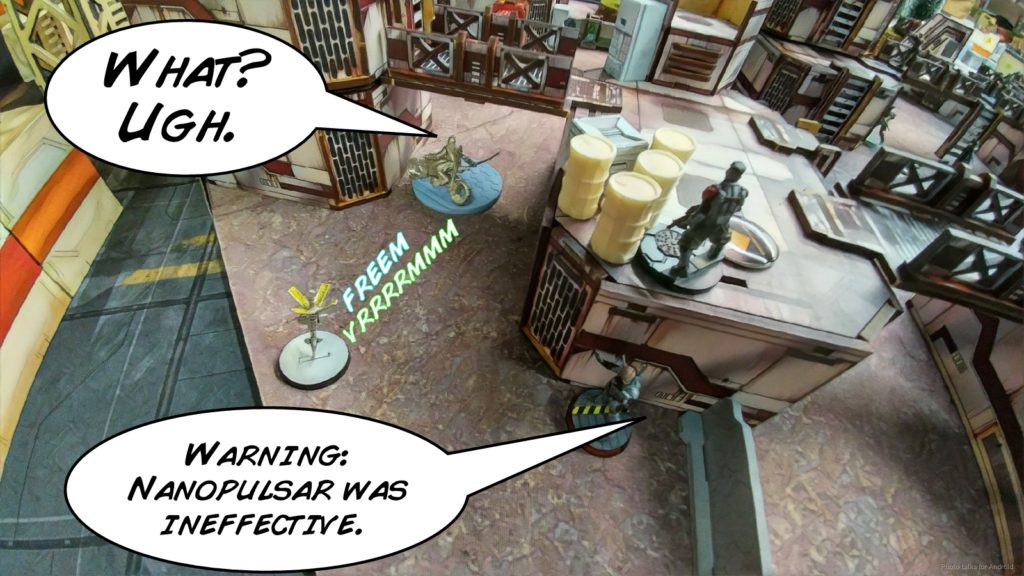 I knew that some of the camo tokens on the left were mines, and I didn’t want to lose Yojimbo to a shock template. I had forgotten to pack Crazy Koalas in my model bag, and I’m still not used to non-Nomad things having Crazy Koalas, so I just forgot about them entirely. No Koalas for me all tournament! Since I couldn’t use Koalas to clear the mines, I sent in the next best thing–a Karakuri. My heavy shotgun Karakuri, proxied here by a Mobile Brigada, stomped her way upfield and obtained LoF to a mine, which she successfully face tanked.
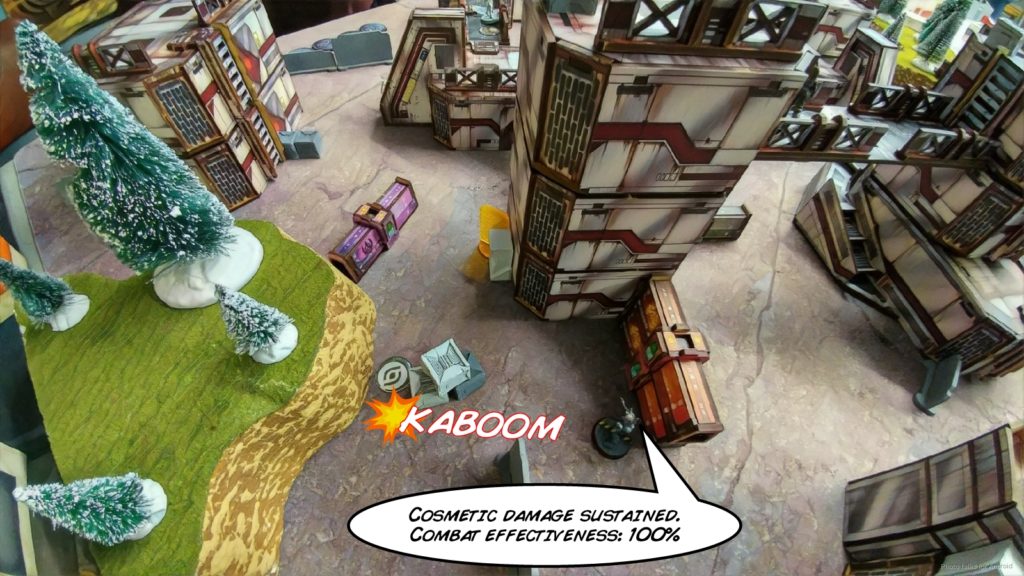 The other token behind the box was also a mine (tricksy Gunnar), but I got the Naga to reveal itself. Our shotgun fire was ineffective, but the mine finally plinked a wound off the Karakuri.
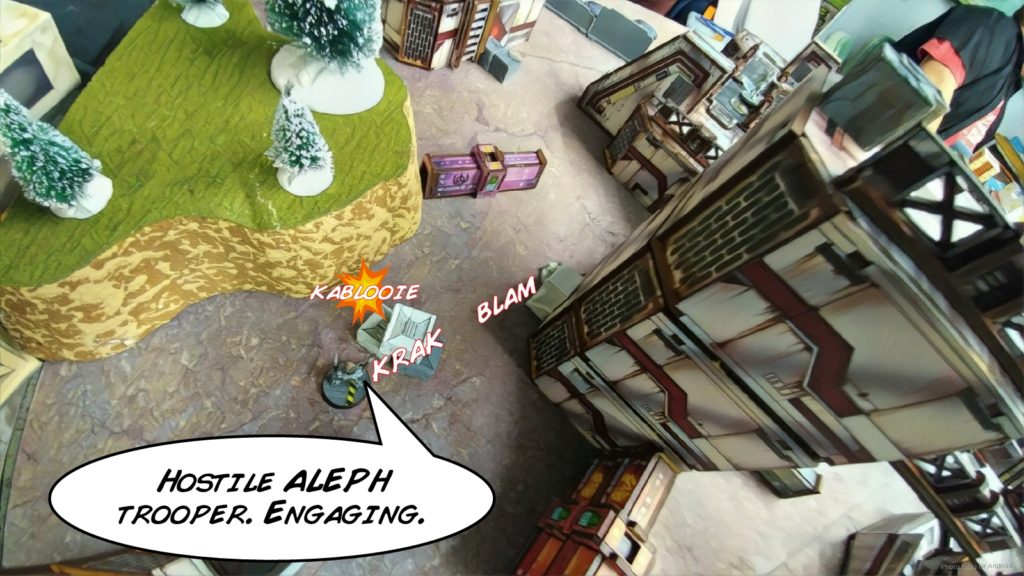 I just kept pushing the Karakuri forward, dumping another two heavy shotgun shells into the Naga where we both were out of cover, and killed it outright by just punching through its dogged state with brute force.
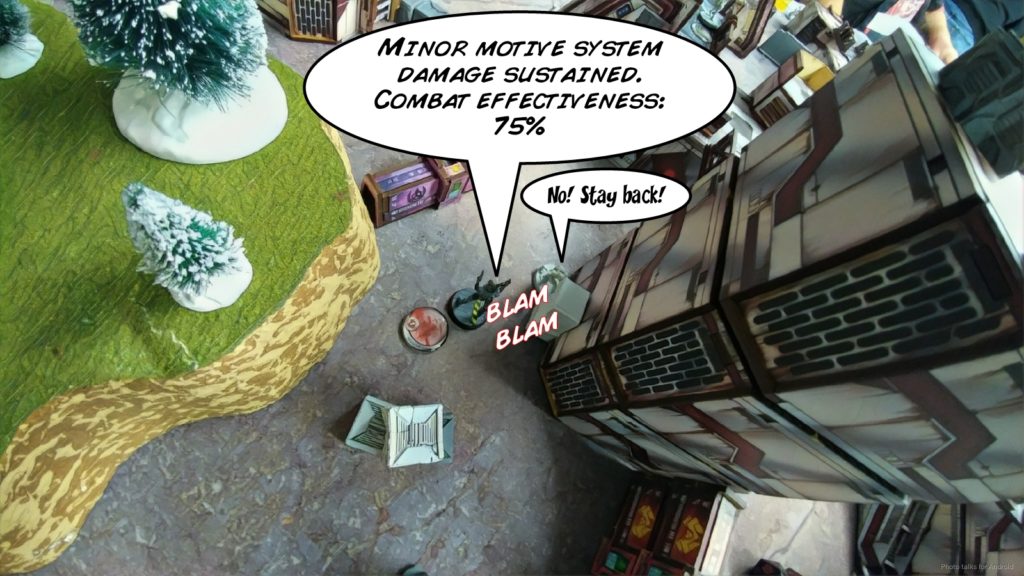 This let me get the Karakuri all the way into view of the Daikini link and drop a shotgun template on all three REMs, knocking out the Paramedic and the HMG.
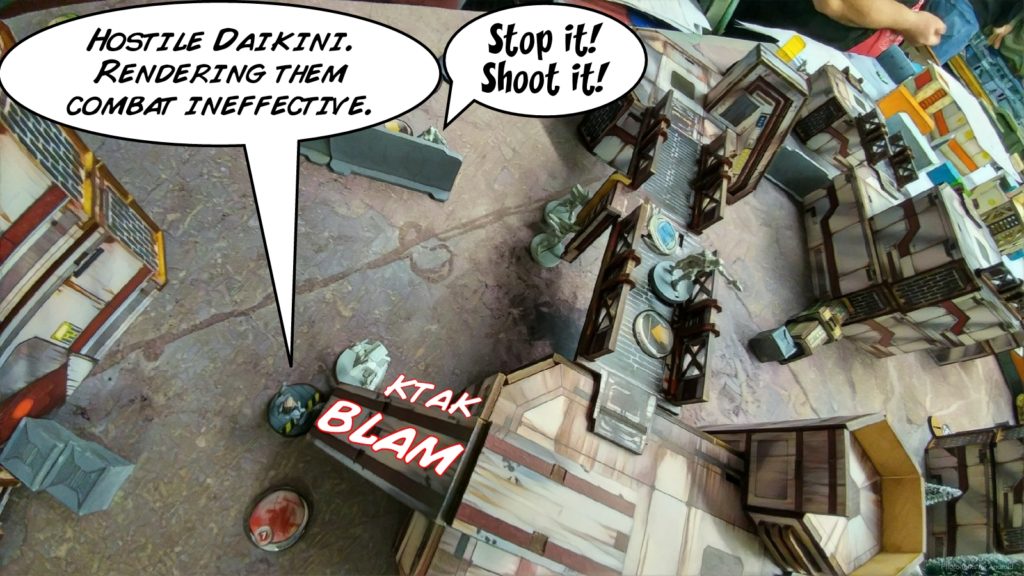 The combi rifle bot required some additional killing, so I threw some more shotgun rounds into it on the way to attacking the Deva.
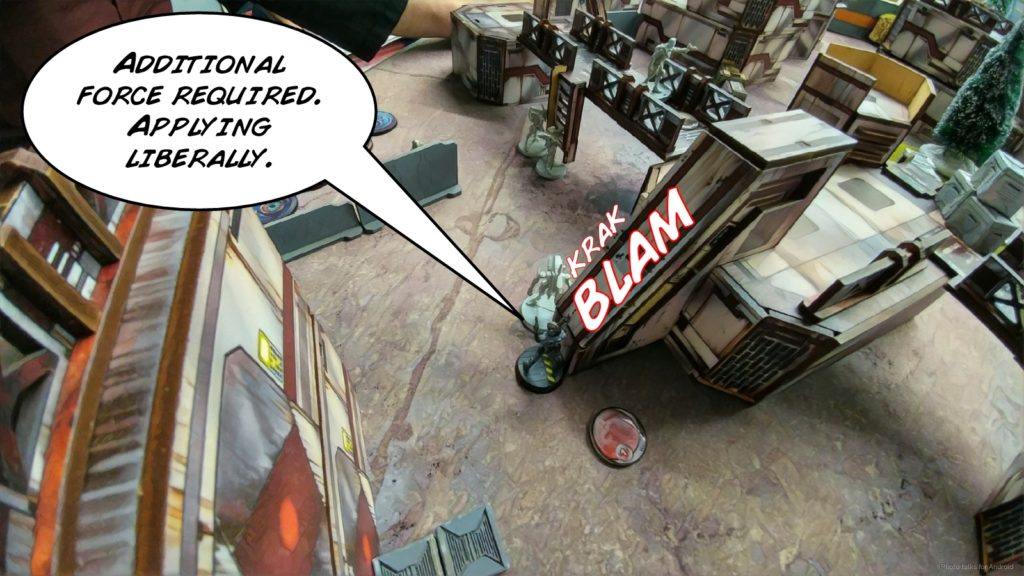 I managed to put a wound on the Deva, with a crit, but she went into NWI as I circled around behind her to get into cover from the rest of Gunnar’s forces.
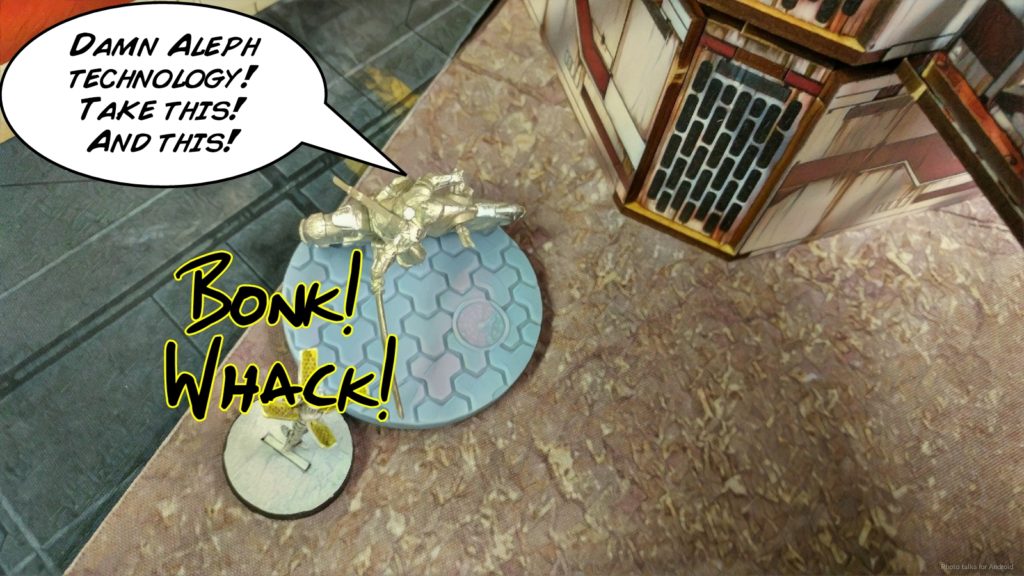
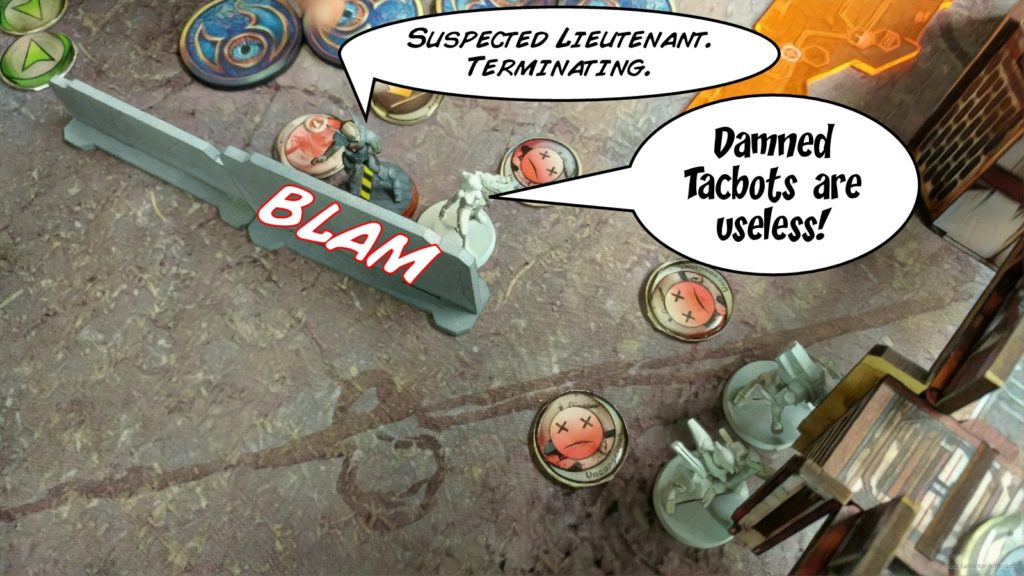 I spent my last order on Yojimbo, racing him back into base to base with the Netrod and smashing it to scrap. Even with two hits from his DA CCW the damn thing only barely died.
Bottom of 1 – OSS
Gunnar spends his Lieutenant order trying to get away from the Karakuri, but I shotgun the Deva off the table in ARO.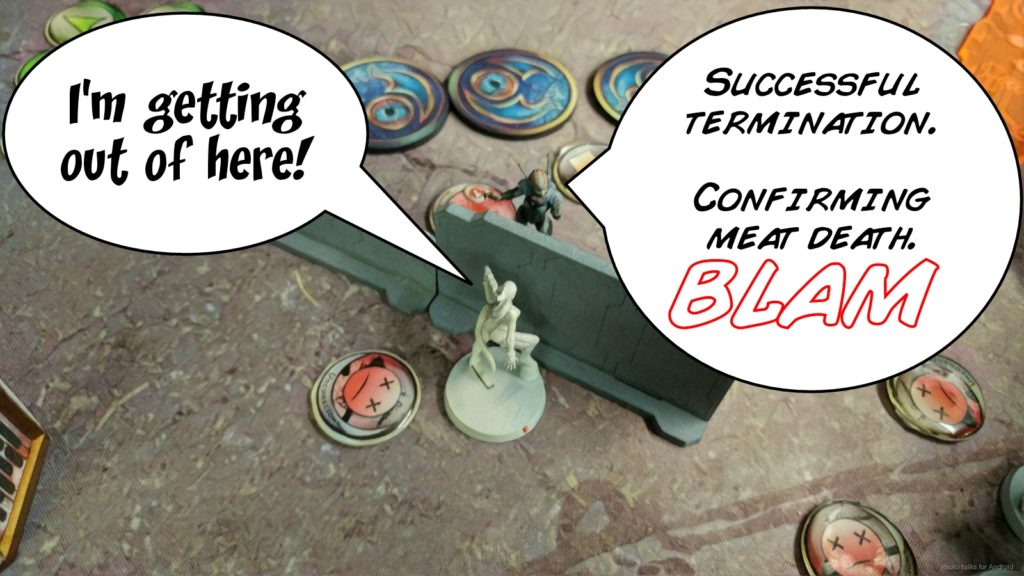 The CSU activates next, landing two LSG shots on my Karakuri and I fail both saves. I didn’t really understand the rules interaction here, as this would’ve put me into unconscious 2, and let me activate dogged, but I was mistaken and just assumed he had killed the Karakuri outright. I did manage to put his CSU dogged with her chain rifle though, so it was entirely worth it.
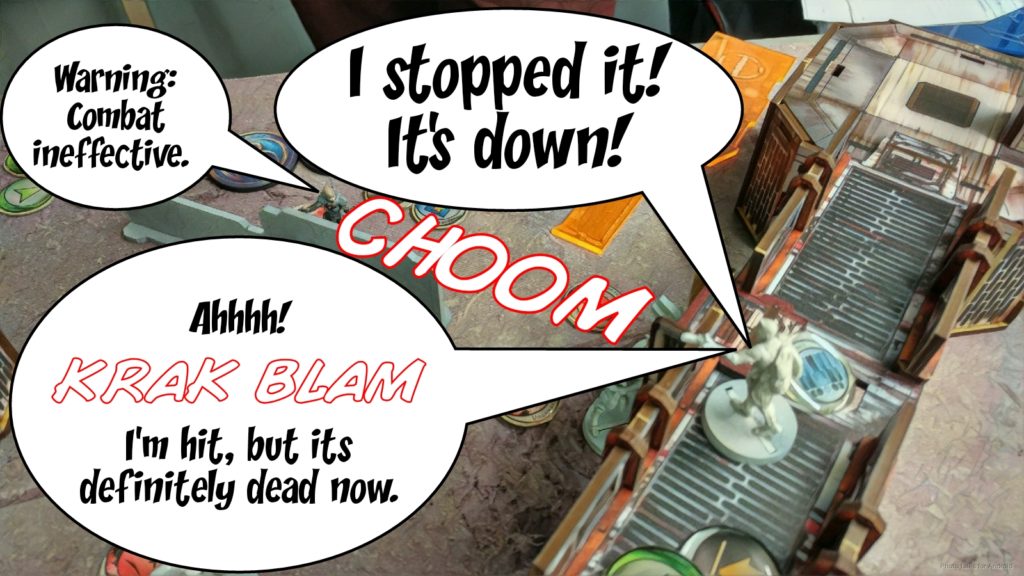 Next, Gunnar turned his attention to his Proxy Mk2, who was prone on the same bridge as my Kaizoku. He shotgunned her off the table but I left him a mine to deal with.
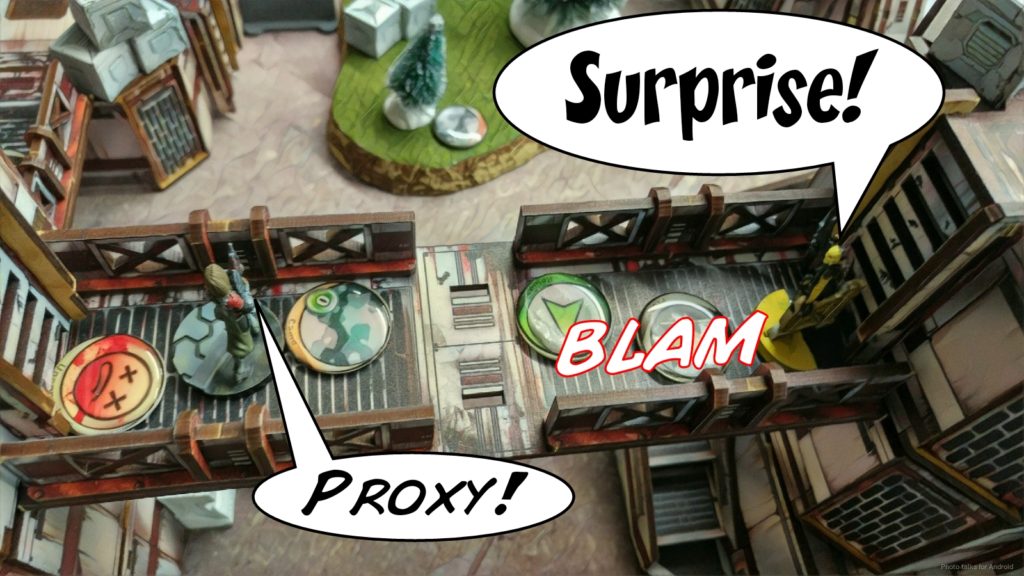 The Proxy failed its dodge while shifting away, but passed ARM. UGH.
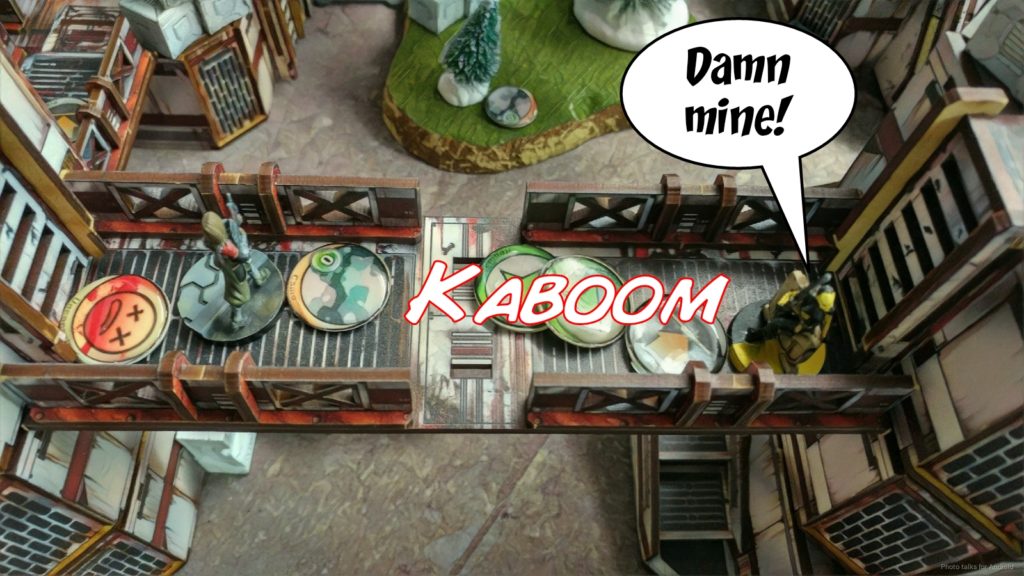 Gunnar then moved his Naga on my right forward, trying to get into position to remove my missile launcher, but my Karakuri combi on the right snagged a discover as it walked by.
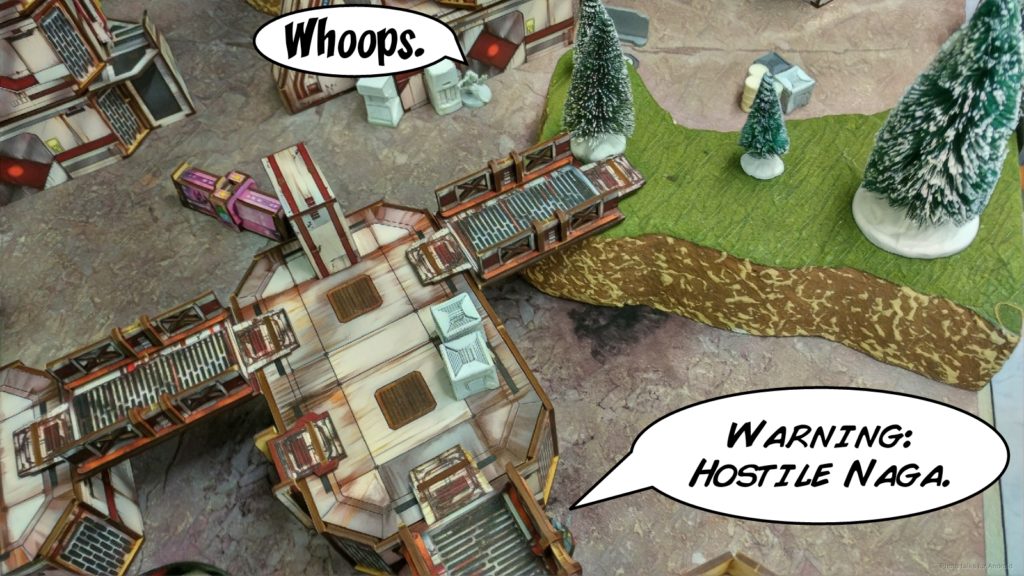 Gunnar then sunk his orders into his Proxy Mk5 and split burst against my Paramedic and my Lieutenant, who was poking out from behind some barrels on the roof. The Paramedic managed to land a hit but I lost the Keisotsu Lt.
Turn 2
Top of 2 – JSA
So, I forgot that the Kempetai has chain of command (super not used to having that skill), and thought I was in Loss of Lieutenant. The Karakuri combi handles the Naga on the right with ease…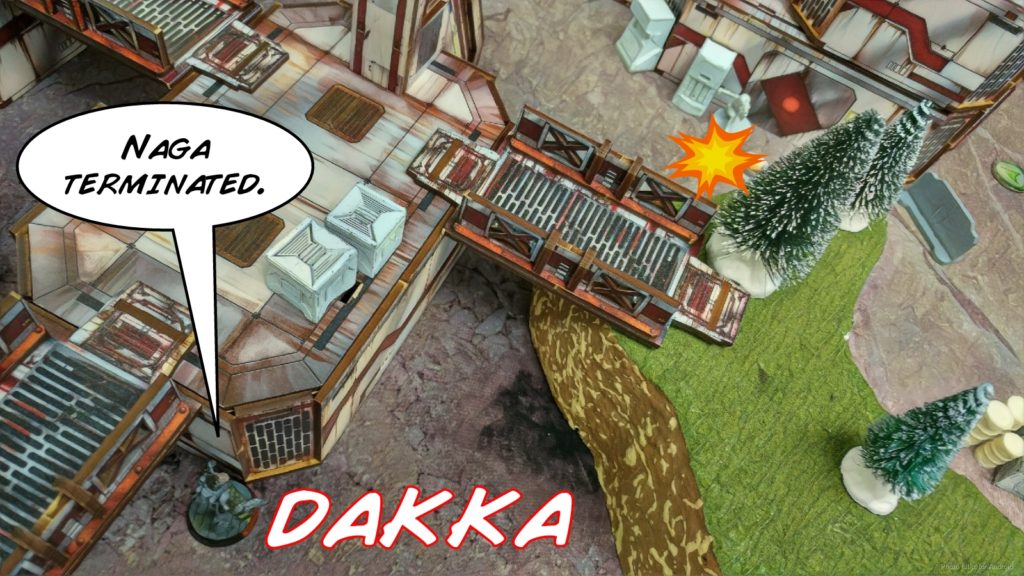 then I start flipping command tokens and orders to move the link around. My Domaru takes out the Mk2 with double chain rifles, but the Proxy’s shotgun takes out the Paramedic behind the Domaru. Not much to be done about that.
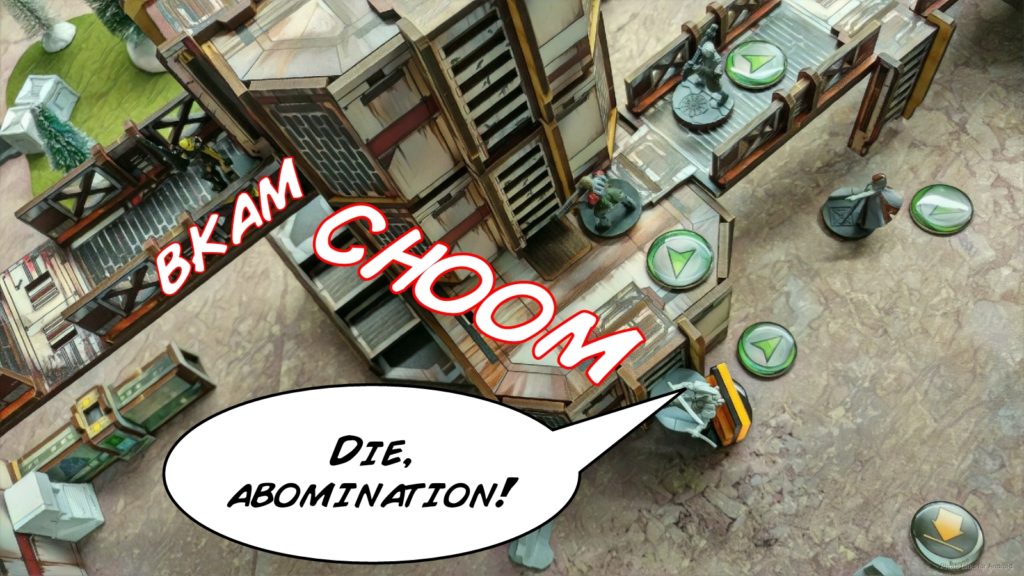 I spend my last few command tokens getting the link into the building, and pass the turn.
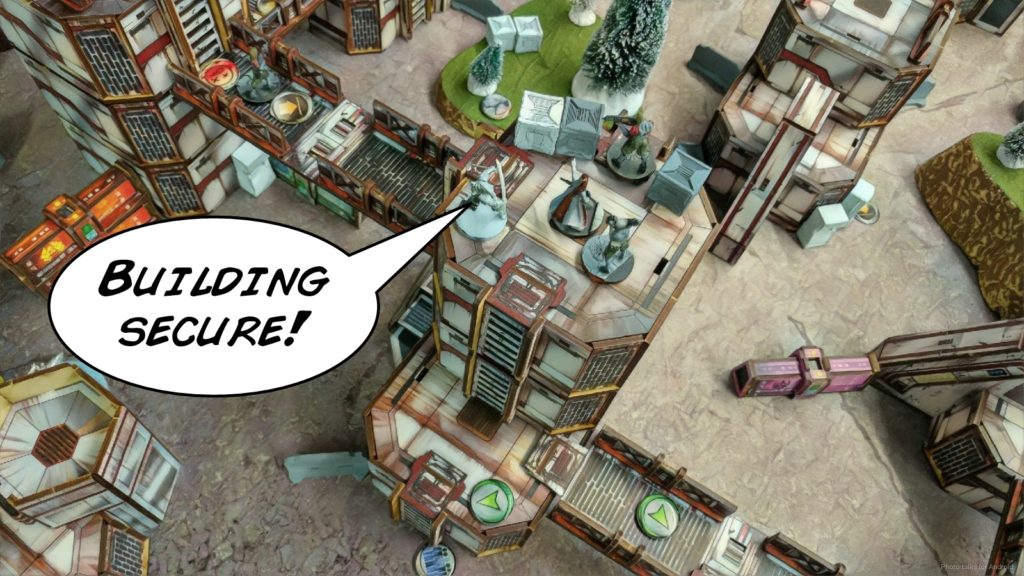
Bottom of 2 – OSS
Gunnar is in retreat, and doesn’t have enough models on the table to outweigh my four models in buildings, so it’s a
Japanese Secessionist Army Victory!
Funnily enough, in all of our games, Gunnar has killed or isolated my Lieutenant. He managed to Oblivion my Mobile Brigada, redrum my Interventor, and shotgun down my Keisotsu. Thankfully, loss of lieutenant isn’t a big a deal as the internet makes it out to be, so those games all went okay.
Notes
Notes for Me
- Remember your skills and equipment! Yojimbo has Koalas and the Kempetai Combi has chain of command.
- The Karakuri heavy shotgun is AMAZING. It has all the things and is such a pain to kill.
- I should’ve planted a mine on the bridge with the Kaizoku, just in case. I need to remember that Gunnar loves his Mk2.
- Pretty much everything went according to plan. Could’ve been a little more conservative with my Lieutenant’s deployment, but oh well.
Notes for Gunnar
- Good work with your Mk2!
- The Nagas were such a good choice for this tournament. Well played there, I just had the right tools for the job.
- Good work putting me in Loss of Lieutenant in all 3 of our games, haha!
Game 2 – What game is this again?
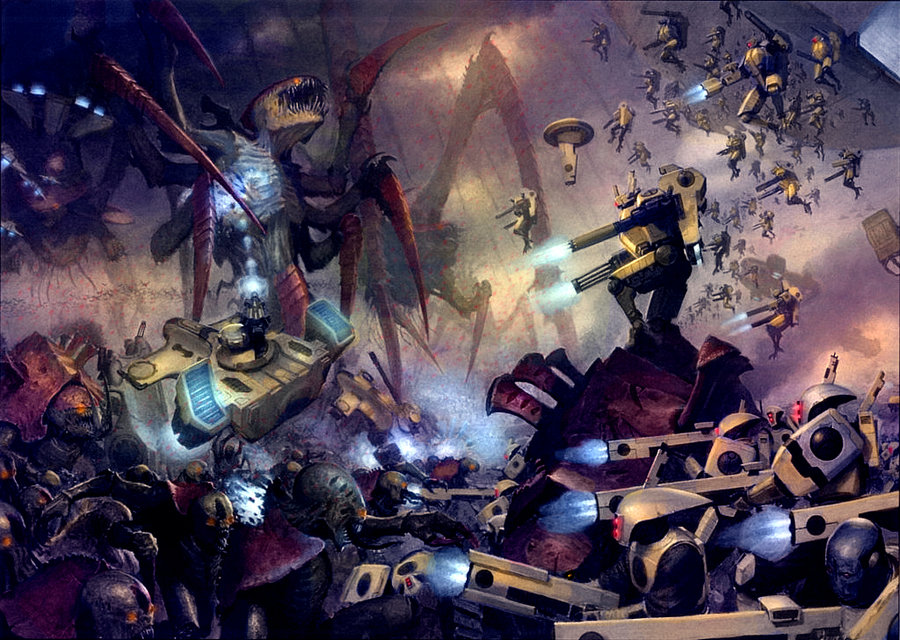 As Gunnar and I were cleaning up after our game, Eric stopped by and tapped me on the shoulder to ask if I would be okay playing against a crazy list my next game. I told him that it would be fine, so after lunch I was paired up against Seth. Seth informed me that he was playing a crazy list, and his intent was to give me the experience of being in a sci-fi B-movie shoot ’em up. He kindly reminded me to leave stuff out to ARO and to take heed of his Q-Drone, and that this game was about the cinematic experience. He then showed me a pile of Hormagants and Termagaunts to represent Gakis and Pretas, and he used Tyranid Warriors for his Imetrons for the cinematic flavor.
Overview
- Mission: The Coin Game
- There will be 10 coins scattered about in the center zone of the table.
- Anybody can pick-up a coin with a successful WIP roll. Specialists and models with the scavenger rule get a +3 on the roll. It takes a short order to pick-up the coin.
- If the roll is failed, the safety system protecting the coin detonates as if the model was struck by a panzerfaust. (The coin stays intact and the trap re-arms.) Command tokens can be used to re-roll failed attempts.
- If a model is killed or goes into a null state, it drops a the coin. A model may carry one coin. Any model with the baggage rule can carry two coins.
- A coin may be dropped in base to base with a short skill or passed off to friendly models by spending a short skill with another friendly model in base to base contact.
- +1 Point for each coin held at the end of the game.
- +1 point for each coin held in their deployment zone at the end of the game. Coins placed in the Deployment Zone count as being held!
- Forces: Japanese Secessionist Army versus
TyranidsCombined Army (200) - Deploy First: Combined Army
- First Turn: Combined Army
[img]https://assets.infinitythegame.net/infinityarmy/img/_logosweb/logo_903.png[/img][b] Raindog B[/b]
[img]https://assets.infinitythegame.net/infinityarmy/img/_logosweb/903/logo_1.png[/img] [b]KEISOTSU Lieutenant[/b] Combi Rifle / Pistol, Knife. (1 | [b]9[/b])
[img]https://assets.infinitythegame.net/infinityarmy/img/_logosweb/903/logo_1.png[/img] [b]KEISOTSU[/b] Missile Launcher / Pistol, Knife. (1.5 | [b]14[/b])
[img]https://assets.infinitythegame.net/infinityarmy/img/_logosweb/903/logo_1.png[/img] [b]KEISOTSU (Forward Observer)[/b] Combi Rifle / Pistol, Knife. (0 | [b]10[/b])
[img]https://assets.infinitythegame.net/infinityarmy/img/_logosweb/903/logo_1.png[/img] [b]KEISOTSU Paramedic (MediKit)[/b] Combi Rifle / Pistol, Knife. (0 | [b]11[/b])
[img]https://assets.infinitythegame.net/infinityarmy/img/_logosweb/903/logo_1000.png[/img] [b]KAIZOKU Spec-Ops (12 XP)[/b] [i](CH: Mimetism)[/i] Combi Rifle, HMG / Pistol, Knife. (0 | [b]9[/b])[img]https://assets.infinitythegame.net/infinityarmy/img/_logosweb/903/logo_4.png[/img] [b]ARAGOTO (Killer Hacking Device)[/b] Combi Rifle + Light Shotgun / Pistol, Knife. (0 | [b]25[/b])
[img]https://assets.infinitythegame.net/infinityarmy/img/_logosweb/903/logo_3.png[/img] [b]RYŪKEN (Forward Deployment L2, ODD)[/b] Submachine Gun, Antipersonnel Mines, D-Charges / 2 Breaker Pistols, Knife. (0.5 | [b]24[/b])
[img]https://assets.infinitythegame.net/infinityarmy/img/_logosweb/903/logo_3.png[/img] [b]RYŪKEN (Forward Deployment L2, ODD)[/b] Submachine Gun, Antipersonnel Mines, D-Charges / 2 Breaker Pistols, Knife. (0.5 | [b]24[/b])
[img]https://assets.infinitythegame.net/infinityarmy/img/_logosweb/903/logo_8.png[/img] [b]SHIKAMI[/b] Contender, Nimbus Grenades / Assault Pistol, DA CCW, AP CCW, Knife. (0 | [b]45[/b])
[img]https://assets.infinitythegame.net/infinityarmy/img/_logosweb/903/logo_11.png[/img] [b]NINJA Hacker (Killer Hacking Device)[/b] Tactical Bow / Pistol, DA CCW, Knife. (0 | [b]29[/b])
[img]https://assets.infinitythegame.net/infinityarmy/img/logos/orden_regular.png[/img]10 [img]https://assets.infinitythegame.net/infinityarmy/img/logos/orden_impetuosa.png[/img]1 [b]| 3.5 SWC | 200 Points |[/b] Open in Infinity Army
[img]https://assets.infinitythegame.net/infinityarmy/img/_logosweb/logo_601.png[/img][b] Combined Army[/b]
[b]GROUP 1 | [/b][img]https://assets.infinitythegame.net/infinityarmy/img/logos/orden_regular.png[/img]4 [img]https://assets.infinitythegame.net/infinityarmy/img/logos/orden_irregular.png[/img]6 [img]https://assets.infinitythegame.net/infinityarmy/img/logos/orden_impetuosa.png[/img]6
[img]https://assets.infinitythegame.net/infinityarmy/img/_logosweb/601/logo_51.png[/img] [b]NEXUS Lieutenant Hacker (EI Hacking Device)[/b] Combi Rifle, Nullifier / Pistol, Knife. (0.5 | [b]24[/b])
[img]https://assets.infinitythegame.net/infinityarmy/img/_logosweb/601/logo_18.png[/img] [b]Q-DRONE[/b] HMG / Electric Pulse. (1 | [b]26[/b])
[img]https://assets.infinitythegame.net/infinityarmy/img/_logosweb/601/logo_36.png[/img] [b]ÍMETRON[/b] . (0 | [b]4[/b])
[img]https://assets.infinitythegame.net/infinityarmy/img/_logosweb/601/logo_36.png[/img] [b]ÍMETRON[/b] . (0 | [b]4[/b])
[img]https://assets.infinitythegame.net/infinityarmy/img/_logosweb/601/logo_15.png[/img] [b]PRETA[/b] Chain Rifle / AP CCW. (0 | [b]7[/b])
[img]https://assets.infinitythegame.net/infinityarmy/img/_logosweb/601/logo_15.png[/img] [b]PRETA[/b] Chain Rifle / AP CCW. (0 | [b]7[/b])
[img]https://assets.infinitythegame.net/infinityarmy/img/_logosweb/601/logo_15.png[/img] [b]PRETA[/b] Chain Rifle / AP CCW. (0 | [b]7[/b])
[img]https://assets.infinitythegame.net/infinityarmy/img/_logosweb/601/logo_15.png[/img] [b]PRETA[/b] Chain Rifle / AP CCW. (0 | [b]7[/b])
[img]https://assets.infinitythegame.net/infinityarmy/img/_logosweb/601/logo_15.png[/img] [b]PRETA[/b] Chain Rifle / AP CCW. (0 | [b]7[/b])
[img]https://assets.infinitythegame.net/infinityarmy/img/_logosweb/601/logo_15.png[/img] [b]PRETA[/b] Chain Rifle / AP CCW. (0 | [b]7[/b])[b]GROUP 2 | [/b][img]https://assets.infinitythegame.net/infinityarmy/img/logos/orden_irregular.png[/img]3 [img]https://assets.infinitythegame.net/infinityarmy/img/logos/orden_impetuosa.png[/img]3
[img]https://assets.infinitythegame.net/infinityarmy/img/_logosweb/601/logo_15.png[/img] [b]PRETA[/b] Chain Rifle / AP CCW. (0 | [b]7[/b])
[img]https://assets.infinitythegame.net/infinityarmy/img/_logosweb/601/logo_15.png[/img] [b]PRETA[/b] Chain Rifle / AP CCW. (0 | [b]7[/b])
[img]https://assets.infinitythegame.net/infinityarmy/img/_logosweb/601/logo_15.png[/img] [b]PRETA[/b] Chain Rifle / AP CCW. (0 | [b]7[/b])[b]GROUP 3 |[/b][img]https://assets.infinitythegame.net/infinityarmy/img/logos/orden_irregular.png[/img]10 [img]https://assets.infinitythegame.net/infinityarmy/img/logos/orden_impetuosa.png[/img]10
[img]https://assets.infinitythegame.net/infinityarmy/img/_logosweb/601/logo_14.png[/img] [b]GAKI[/b] AP CCW. (0 | [b]4[/b])
[img]https://assets.infinitythegame.net/infinityarmy/img/_logosweb/601/logo_14.png[/img] [b]GAKI[/b] AP CCW. (0 | [b]4[/b])
[img]https://assets.infinitythegame.net/infinityarmy/img/_logosweb/601/logo_14.png[/img] [b]GAKI[/b] AP CCW. (0 | [b]4[/b])
[img]https://assets.infinitythegame.net/infinityarmy/img/_logosweb/601/logo_14.png[/img] [b]GAKI[/b] AP CCW. (0 | [b]4[/b])
[img]https://assets.infinitythegame.net/infinityarmy/img/_logosweb/601/logo_14.png[/img] [b]GAKI[/b] AP CCW. (0 | [b]4[/b])
[img]https://assets.infinitythegame.net/infinityarmy/img/_logosweb/601/logo_14.png[/img] [b]GAKI[/b] AP CCW. (0 | [b]4[/b])
[img]https://assets.infinitythegame.net/infinityarmy/img/_logosweb/601/logo_14.png[/img] [b]GAKI[/b] AP CCW. (0 | [b]4[/b])
[img]https://assets.infinitythegame.net/infinityarmy/img/_logosweb/601/logo_14.png[/img] [b]GAKI[/b] AP CCW. (0 | [b]4[/b])
[img]https://assets.infinitythegame.net/infinityarmy/img/_logosweb/601/logo_14.png[/img] [b]GAKI[/b] AP CCW. (0 | [b]4[/b])
[img]https://assets.infinitythegame.net/infinityarmy/img/_logosweb/601/logo_14.png[/img] [b]GAKI[/b] AP CCW. (0 | [b]4[/b])[b]GROUP 4[/b][img]https://assets.infinitythegame.net/infinityarmy/img/logos/orden_irregular.png[/img]9 [img]https://assets.infinitythegame.net/infinityarmy/img/logos/orden_impetuosa.png[/img]9
[img]https://assets.infinitythegame.net/infinityarmy/img/_logosweb/601/logo_14.png[/img] [b]GAKI[/b] AP CCW. (0 | [b]4[/b])
[img]https://assets.infinitythegame.net/infinityarmy/img/_logosweb/601/logo_14.png[/img] [b]GAKI[/b] AP CCW. (0 | [b]4[/b])
[img]https://assets.infinitythegame.net/infinityarmy/img/_logosweb/601/logo_14.png[/img] [b]GAKI[/b] AP CCW. (0 | [b]4[/b])
[img]https://assets.infinitythegame.net/infinityarmy/img/_logosweb/601/logo_14.png[/img] [b]GAKI[/b] AP CCW. (0 | [b]4[/b])
[img]https://assets.infinitythegame.net/infinityarmy/img/_logosweb/601/logo_14.png[/img] [b]GAKI[/b] AP CCW. (0 | [b]4[/b])
[img]https://assets.infinitythegame.net/infinityarmy/img/_logosweb/601/logo_14.png[/img] [b]GAKI[/b] AP CCW. (0 | [b]4[/b])
[img]https://assets.infinitythegame.net/infinityarmy/img/_logosweb/601/logo_14.png[/img] [b]GAKI[/b] AP CCW. (0 | [b]4[/b])
[img]https://assets.infinitythegame.net/infinityarmy/img/_logosweb/601/logo_14.png[/img] [b]GAKI[/b] AP CCW. (0 | [b]4[/b])
[img]https://assets.infinitythegame.net/infinityarmy/img/_logosweb/601/logo_14.png[/img] [b]GAKI[/b] AP CCW. (0 | [b]4[/b])
[b] 1.5 SWC | 197 Points |[/b] Open in Infinity Army
Deployment
Seth chose to go first, so I had him set up first. I chose the side with the most open areas before my deployment zone, for obvious reasons. I’ve only marked the non-Hungries models. The two Imetrons didn’t scatter and landed in cover right where Seth wanted, and he stuck his Nexus Lt behind some cover. The Q-Drone was left out a bit, and within a blast template of some Gakis. 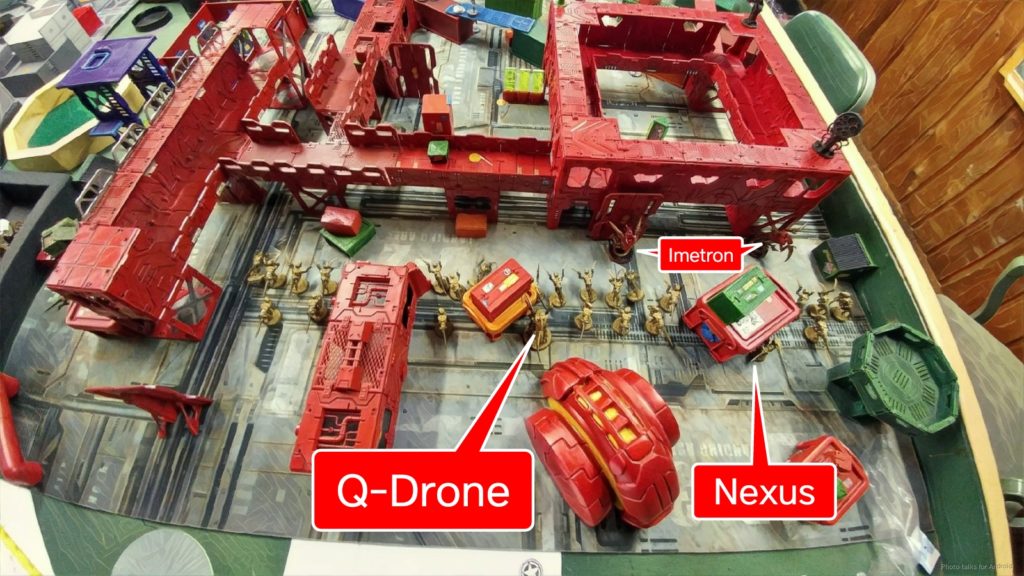 I knew then that literally the only thing that mattered about my deployment was that I got my missile launcher covering the Gakis in front of the Q-Drone and that I put enough ablative wounds on my flanks to protect the missile launcher. I left everything out to ARO, with the exception of the Ninja.
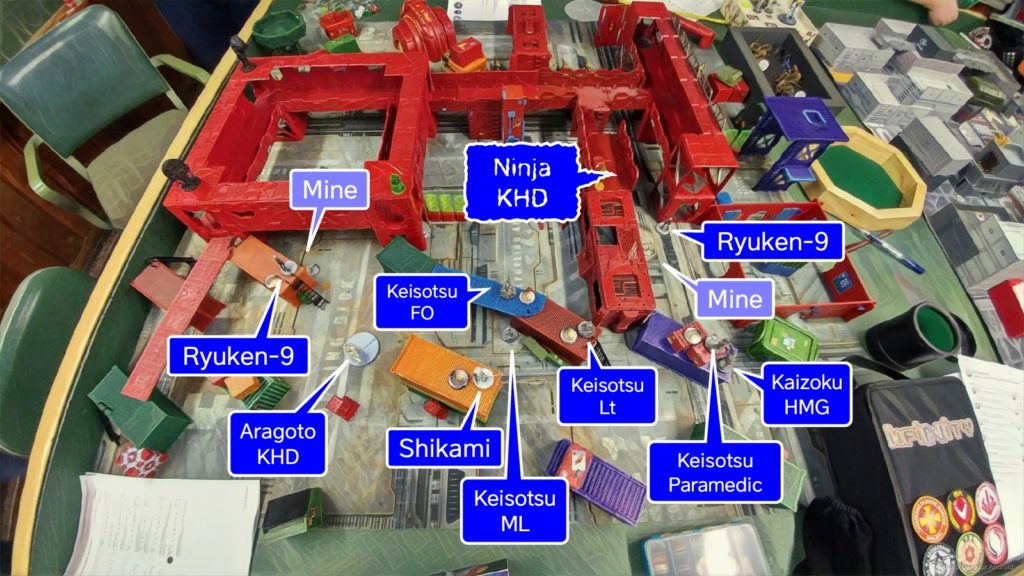
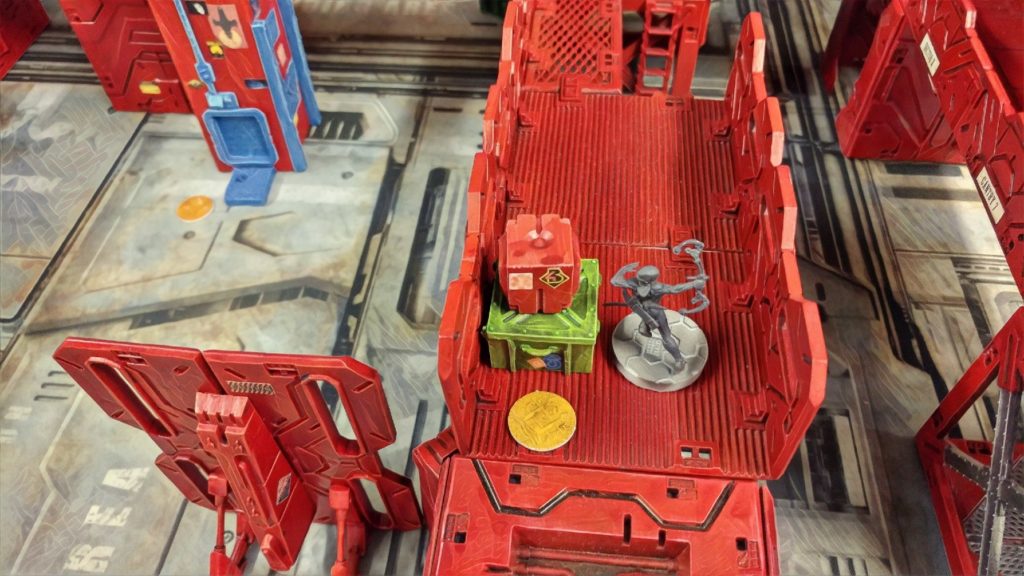 I carefully placed the link covering all the major approaches, Ryuken-9 on the flanks to draw the Hungries in, and even left my Shikami and Aragato out to take pot shots their contender and combi, respectively.
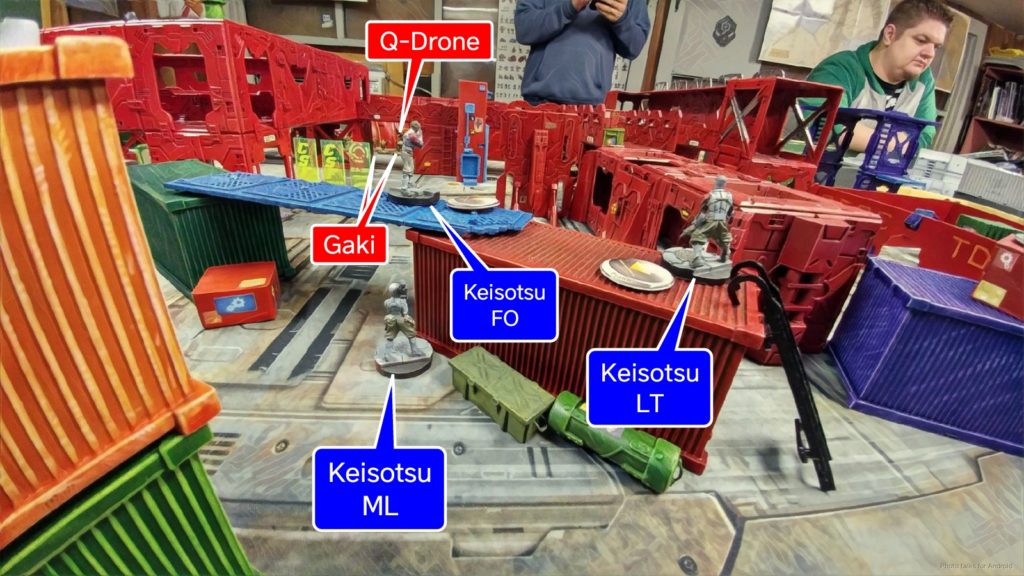 Here you can see the shot I have on the Q-Drone. If I don’t kill it with the missile, my entire link is dead, so I stacked up two AROs just in case it miraculously survived.
Turn 1
Top of 1 – Combined Army
The horde starts flooding forwards. Seth activates the Gakis and the Pretas starting on my right and moving to my left. 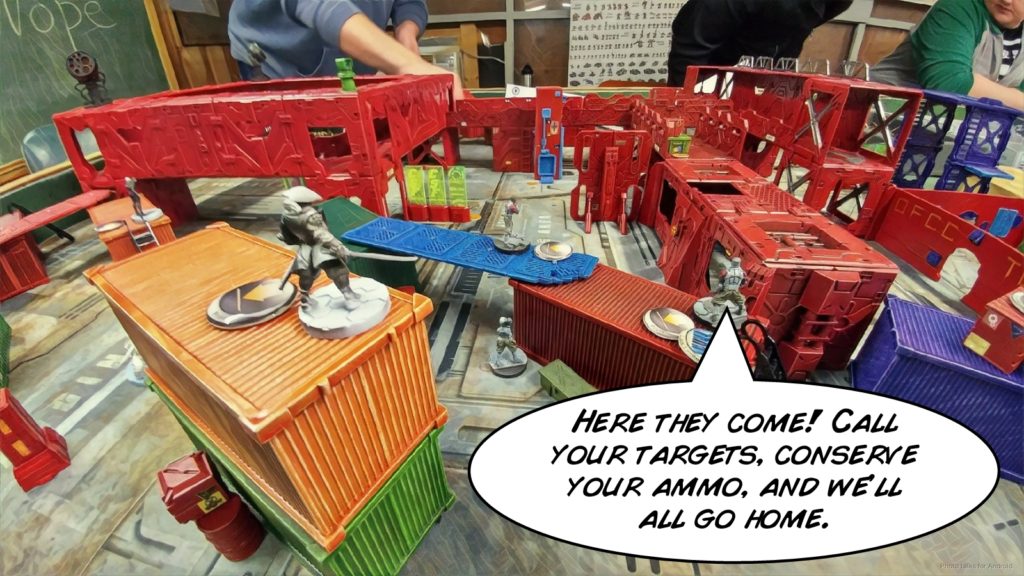 We chew through their impetuous orders with blinding speed, just chucking dice and removing models as I land shock SMG shots, HMG rounds, combi fire, and missile templates. Seth makes a few dodge rolls and some of the Hungries survive. Eventually we get to the Gaki in front of the Q-Drone, and I roll two hits with the missile launcher, catching the Q-Drone with a pair of missile blasts, blowing it off the table. I breathe a sigh of relief and we finish out the line of Hungries going all the way to my left. Finally, the remnants spend their impetuous order, and this is a bit scary as now my Ryuken are in range. The one on the right whiffs her shot against a Gaki as it moves into base to base, but the HMG and Paramedic Keisotsus watching over her paste it before it can explode.
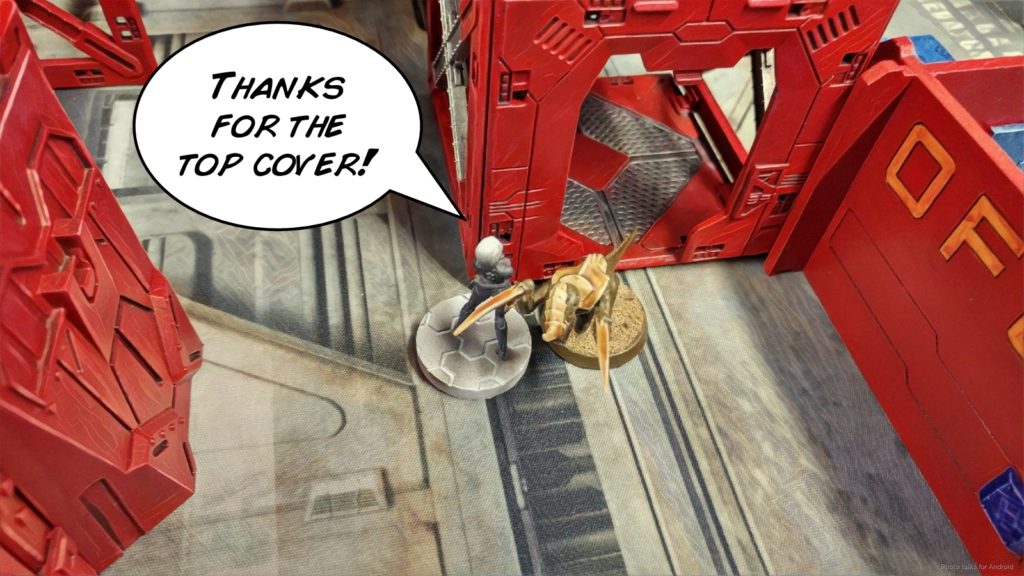 She even manages to survive a few Preta chain rifles before finally succumbing to the weight of fire.
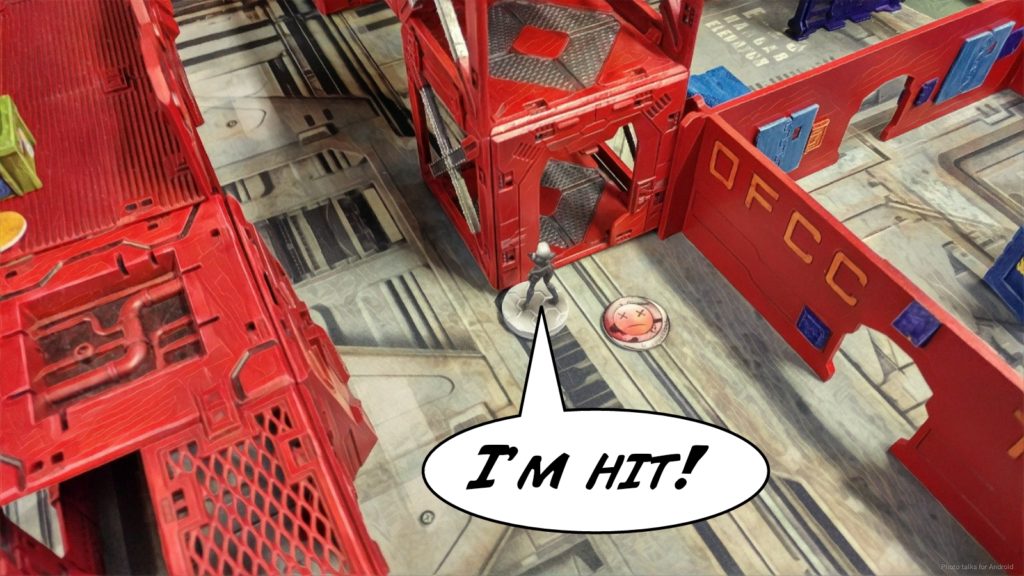 At the end of Seth’s turn, he’s got two Imetrons, a Nexus, two Gakis, and a Preta left. The Preta screens against my Aragoto, and the two Gakis take a ride in an elevator up to the second level of the catwalks, where some coins are.
 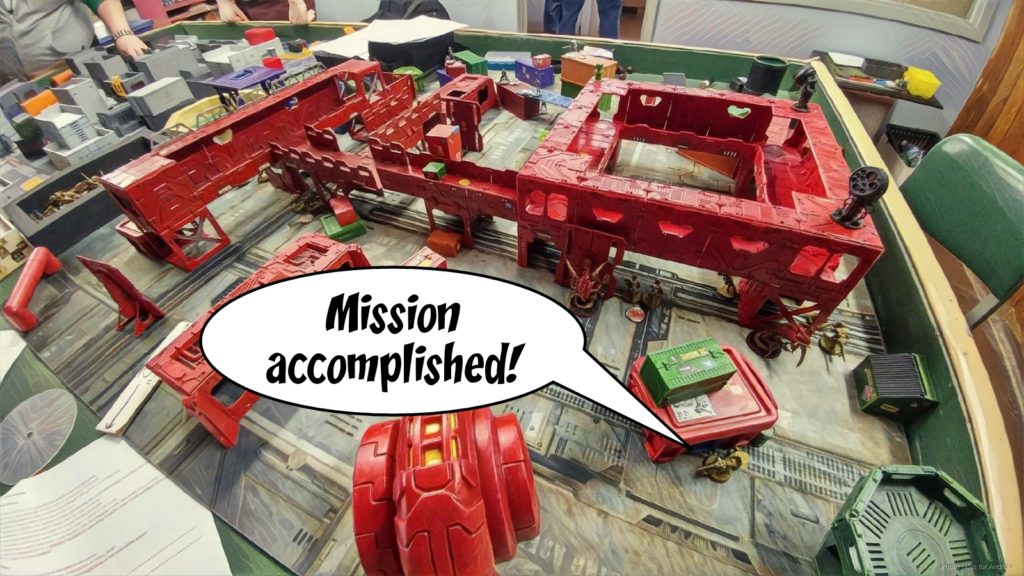 Seth spends four orders and his Lieutenant order retrieving a coin with some fancy cautious movement, and then passes the turn to me.
Bottom of 1 – JSA
He’s basically got nothing out to ARO and will be in Retreat next turn, so I have the run of the board and snag 3 coins and bring them back to my DZ. The Aragoto gets chain rifled by the Preta on the way back with a 4th coin, and the Ryuken on the left gets Panzerfausted trying to pick up the coin off the dead Aragato, but it’s still a
Japanese Secessionist Army Victory!
Notes
Notes for Me
- Again, everything went to plan. All I needed was that missile hit on the Q-Drone, and everything would be gravy.
Notes for Seth
- What an experience! Definitely felt like I was holding back an alien horde. The pressure of all the rapid dice rolling really contributed to the fun, and I had a blast playing against your crazy list!
- I think the only mistake you made was leaving the Q-Drone out on the first turn. If you had hid it, you could’ve potentially spent those 4 orders taking out my link.
- Your list really showcases the robustness of the Infinity rule system. You can play a list like that and it has a real chance of winning. Had you done enough damage with the Q-Drone as you moved your Lt into position to grab the coin, then you basically only give me 1 turn (thanks to retreat) with a damaged list to go get a bunch of (very dangerous) coins.
- You mentioned after the game that folks were encouraging you to play a list with smoke, but you feared it would be “too mean.” I disagree, and humbly submit this for your consideration:
[img]https://assets.infinitythegame.net/infinityarmy/img/_logosweb/logo_601.png[/img][b] Combined Army[/b]
[b]GROUP 1 |[/b][img]https://assets.infinitythegame.net/infinityarmy/img/logos/orden_regular.png[/img]9 [img]https://assets.infinitythegame.net/infinityarmy/img/logos/orden_impetuosa.png[/img]2
[img]https://assets.infinitythegame.net/infinityarmy/img/_logosweb/601/logo_7.png[/img] [b]CHARONTID Lieutenant Hacker (Hacking Device Plus)[/b] Plasma Rifle, Nanopulser / Heavy Pistol, Knife. (0.5 | [b]73[/b])
[img]https://assets.infinitythegame.net/infinityarmy/img/_logosweb/601/logo_13.png[/img] [b]DĀTURAZI[/b] Chain Rifle, Grenades, Smoke Grenades / Pistol, AP CCW. (0 | [b]14[/b])
[img]https://assets.infinitythegame.net/infinityarmy/img/_logosweb/601/logo_13.png[/img] [b]DĀTURAZI[/b] Chain Rifle, Grenades, Smoke Grenades / Pistol, AP CCW. (0 | [b]14[/b])
[img]https://assets.infinitythegame.net/infinityarmy/img/_logosweb/601/logo_41.png[/img] [b]IKADRON (Baggage, Repeater)[/b] 2 Light Flamethrowers, Flash Pulse / Pistol, Electric Pulse. (0 | [b]9[/b])
[img]https://assets.infinitythegame.net/infinityarmy/img/_logosweb/601/logo_41.png[/img] [b]IKADRON (Baggage, Repeater)[/b] 2 Light Flamethrowers, Flash Pulse / Pistol, Electric Pulse. (0 | [b]9[/b])
[img]https://assets.infinitythegame.net/infinityarmy/img/_logosweb/601/logo_20.png[/img] [b]R-DRONE[/b] Flash Pulse, Sniffer / Electric Pulse. (0 | [b]8[/b])
[img]https://assets.infinitythegame.net/infinityarmy/img/_logosweb/601/logo_20.png[/img] [b]R-DRONE[/b] Flash Pulse, Sniffer / Electric Pulse. (0 | [b]8[/b])
[img]https://assets.infinitythegame.net/infinityarmy/img/_logosweb/601/logo_36.png[/img] [b]ÍMETRON[/b] . (0 | [b]4[/b])
[img]https://assets.infinitythegame.net/infinityarmy/img/_logosweb/601/logo_36.png[/img] [b]ÍMETRON[/b] . (0 | [b]4[/b])[b]GROUP 2 | [/b][img]https://assets.infinitythegame.net/infinityarmy/img/logos/orden_irregular.png[/img]10 [img]https://assets.infinitythegame.net/infinityarmy/img/logos/orden_impetuosa.png[/img]10
[img]https://assets.infinitythegame.net/infinityarmy/img/_logosweb/601/logo_15.png[/img] [b]PRETA[/b] Chain Rifle / AP CCW. (0 | [b]7[/b])
[img]https://assets.infinitythegame.net/infinityarmy/img/_logosweb/601/logo_15.png[/img] [b]PRETA[/b] Chain Rifle / AP CCW. (0 | [b]7[/b])
[img]https://assets.infinitythegame.net/infinityarmy/img/_logosweb/601/logo_15.png[/img] [b]PRETA[/b] Chain Rifle / AP CCW. (0 | [b]7[/b])
[img]https://assets.infinitythegame.net/infinityarmy/img/_logosweb/601/logo_15.png[/img] [b]PRETA[/b] Chain Rifle / AP CCW. (0 | [b]7[/b])
[img]https://assets.infinitythegame.net/infinityarmy/img/_logosweb/601/logo_15.png[/img] [b]PRETA[/b] Chain Rifle / AP CCW. (0 | [b]7[/b])
[img]https://assets.infinitythegame.net/infinityarmy/img/_logosweb/601/logo_14.png[/img] [b]GAKI[/b] AP CCW. (0 | [b]4[/b])
[img]https://assets.infinitythegame.net/infinityarmy/img/_logosweb/601/logo_14.png[/img] [b]GAKI[/b] AP CCW. (0 | [b]4[/b])
[img]https://assets.infinitythegame.net/infinityarmy/img/_logosweb/601/logo_14.png[/img] [b]GAKI[/b] AP CCW. (0 | [b]4[/b])
[img]https://assets.infinitythegame.net/infinityarmy/img/_logosweb/601/logo_14.png[/img] [b]GAKI[/b] AP CCW. (0 | [b]4[/b])
[img]https://assets.infinitythegame.net/infinityarmy/img/_logosweb/601/logo_14.png[/img] [b]GAKI[/b] AP CCW. (0 | [b]4[/b])
[b] 0.5 SWC | 198 Points |[/b] Open in Infinity Army
Game 3 – To Infinity and Beyond
 Game 3 was against Birman, who was playing Tunguska. I’ve seen him around various Infinity gatherings, but never had the chance to play him. I knew this would be be a tough challenge because of the sheer troop quality that you can get in Tunguska. I opted to go first, hoping to do some damage to his link and his specialist pool before he had a turn.
Overview
- Mission: The Flip Side
- There are five coins on the table. Each is worth a hidden amount of points. Possible values are 2, 2, 3, 4, 5.
- A successful Spotlight program or Forward Observer attempt allows the player (but not his opponent) to look at the coin to see the amount.
- Only Specialists may pick up the coin. It takes a short order (attack) to pick up the coin. The player may look at the coin to see it’s value upon picking it up.
- The player holding the highest cumulative sum of coins wins the game
- Forces: Japanese Secessionist Army versus Jurisdictional Command of Tunguska (200)
- Deploy First: JSA
- First Turn: JSA
[img]https://assets.infinitythegame.net/infinityarmy/img/_logosweb/logo_903.png[/img][b] Raindog B[/b]
[img]https://assets.infinitythegame.net/infinityarmy/img/_logosweb/903/logo_1.png[/img] [b]KEISOTSU Lieutenant[/b] Combi Rifle / Pistol, Knife. (1 | [b]9[/b])
[img]https://assets.infinitythegame.net/infinityarmy/img/_logosweb/903/logo_1.png[/img] [b]KEISOTSU[/b] Missile Launcher / Pistol, Knife. (1.5 | [b]14[/b])
[img]https://assets.infinitythegame.net/infinityarmy/img/_logosweb/903/logo_1.png[/img] [b]KEISOTSU (Forward Observer)[/b] Combi Rifle / Pistol, Knife. (0 | [b]10[/b])
[img]https://assets.infinitythegame.net/infinityarmy/img/_logosweb/903/logo_1.png[/img] [b]KEISOTSU Paramedic (MediKit)[/b] Combi Rifle / Pistol, Knife. (0 | [b]11[/b])
[img]https://assets.infinitythegame.net/infinityarmy/img/_logosweb/903/logo_1000.png[/img] [b]KAIZOKU Spec-Ops (12 XP)[/b] [i](CH: Mimetism)[/i] Combi Rifle, HMG / Pistol, Knife. (0 | [b]9[/b])[img]https://assets.infinitythegame.net/infinityarmy/img/_logosweb/903/logo_4.png[/img] [b]ARAGOTO (Killer Hacking Device)[/b] Combi Rifle + Light Shotgun / Pistol, Knife. (0 | [b]25[/b])
[img]https://assets.infinitythegame.net/infinityarmy/img/_logosweb/903/logo_3.png[/img] [b]RYŪKEN (Forward Deployment L2, ODD)[/b] Submachine Gun, Antipersonnel Mines, D-Charges / 2 Breaker Pistols, Knife. (0.5 | [b]24[/b])
[img]https://assets.infinitythegame.net/infinityarmy/img/_logosweb/903/logo_3.png[/img] [b]RYŪKEN (Forward Deployment L2, ODD)[/b] Submachine Gun, Antipersonnel Mines, D-Charges / 2 Breaker Pistols, Knife. (0.5 | [b]24[/b])
[img]https://assets.infinitythegame.net/infinityarmy/img/_logosweb/903/logo_8.png[/img] [b]SHIKAMI[/b] Contender, Nimbus Grenades / Assault Pistol, DA CCW, AP CCW, Knife. (0 | [b]45[/b])
[img]https://assets.infinitythegame.net/infinityarmy/img/_logosweb/903/logo_11.png[/img] [b]NINJA Hacker (Killer Hacking Device)[/b] Tactical Bow / Pistol, DA CCW, Knife. (0 | [b]29[/b])
[img]https://assets.infinitythegame.net/infinityarmy/img/logos/orden_regular.png[/img]10 [img]https://assets.infinitythegame.net/infinityarmy/img/logos/orden_impetuosa.png[/img]1 [b]| 3.5 SWC | 200 Points |[/b] Open in Infinity Army
[img]https://assets.infinitythegame.net/infinityarmy/img/_logosweb/logo_504.png[/img][b] Jurisdictional Command of Tunguska[/b]
[img]https://assets.infinitythegame.net/infinityarmy/img/_logosweb/504/logo_1.png[/img] [b]SECURITATE Lieutenant[/b] Combi Rifle / Pistol, Knife. (0 | [b]13[/b])
[img]https://assets.infinitythegame.net/infinityarmy/img/_logosweb/504/logo_1000.png[/img] [b]VORTEX Spec-Ops (12 XP)[/b] [i](CH: Mimetism)[/i] Combi Rifle, HMG / Pistol, Knife. (0 | [b]13[/b])
[img]https://assets.infinitythegame.net/infinityarmy/img/_logosweb/504/logo_1.png[/img] [b]SECURITATE[/b] Combi Rifle / Pistol, Knife. (0 | [b]13[/b])
[img]https://assets.infinitythegame.net/infinityarmy/img/_logosweb/504/logo_1.png[/img] [b]SECURITATE[/b] Combi Rifle / Pistol, Knife. (0 | [b]13[/b])
[img]https://assets.infinitythegame.net/infinityarmy/img/_logosweb/504/logo_1.png[/img] [b]SECURITATE[/b] Feuerbach / Pistol, Knife. (1 | [b]22[/b])[img]https://assets.infinitythegame.net/infinityarmy/img/_logosweb/504/logo_11.png[/img] [b]MARY PROBLEMS Hacker (Forward Deployment L1)[/b] Submachine Gun + Zapper, Pitcher / Pistol, Knife. (0.5 | [b]30[/b])
[img]https://assets.infinitythegame.net/infinityarmy/img/_logosweb/504/logo_10.png[/img] [b]PUPPET MASTERS[/b] Submachine Gun / PistolKnife. (0 | [b]12[/b])[img]https://assets.infinitythegame.net/infinityarmy/img/_logosweb/504/logo_10.png[/img] [b]PUPPETBOT (Marksmanship L1)[/b] AP Marksman Rifle / Electric Pulse. (0 | [b]14[/b])
[img]https://assets.infinitythegame.net/infinityarmy/img/_logosweb/504/logo_10.png[/img] [b]PUPPETBOT (Forward Observer)[/b] Boarding Shotgun / Electric Pulse. (0 | [b]11[/b])
[img]https://assets.infinitythegame.net/infinityarmy/img/_logosweb/504/logo_10.png[/img] [b]PUPPETBOT (Forward Observer)[/b] Boarding Shotgun / Electric Pulse. (0 | [b]11[/b])[img]https://assets.infinitythegame.net/infinityarmy/img/_logosweb/504/logo_3.png[/img] [b]ZONDNAUT[/b] Spitfire / Pistol, Knife. (1 | [b]32[/b])
[img]https://assets.infinitythegame.net/infinityarmy/img/logos/sep.gif[/img] [img]https://assets.infinitythegame.net/infinityarmy/img/_logosweb/504/logo_3.png[/img] [b]ZONDMATE[/b] Chain Rifle, Smoke Light Grenade Launcher / Electric Pulse. ([b]5[/b])
[img]https://assets.infinitythegame.net/infinityarmy/img/_logosweb/504/logo_22.png[/img] [b]TRANSDUCTOR ZOND[/b] Flash Pulse, Sniffer / Electric Pulse. (0 | [b]8[/b])
[img]https://assets.infinitythegame.net/infinityarmy/img/_logosweb/504/logo_22.png[/img] [b]TRANSDUCTOR ZOND[/b] Flash Pulse, Sniffer / Electric Pulse. (0 | [b]8[/b])
[img]https://assets.infinitythegame.net/infinityarmy/img/logos/orden_regular.png[/img]10 [img]https://assets.infinitythegame.net/infinityarmy/img/logos/orden_impetuosa.png[/img]1 [b]| 2.5 SWC | 200 Points |[/b] Open in Infinity Army
Deployment
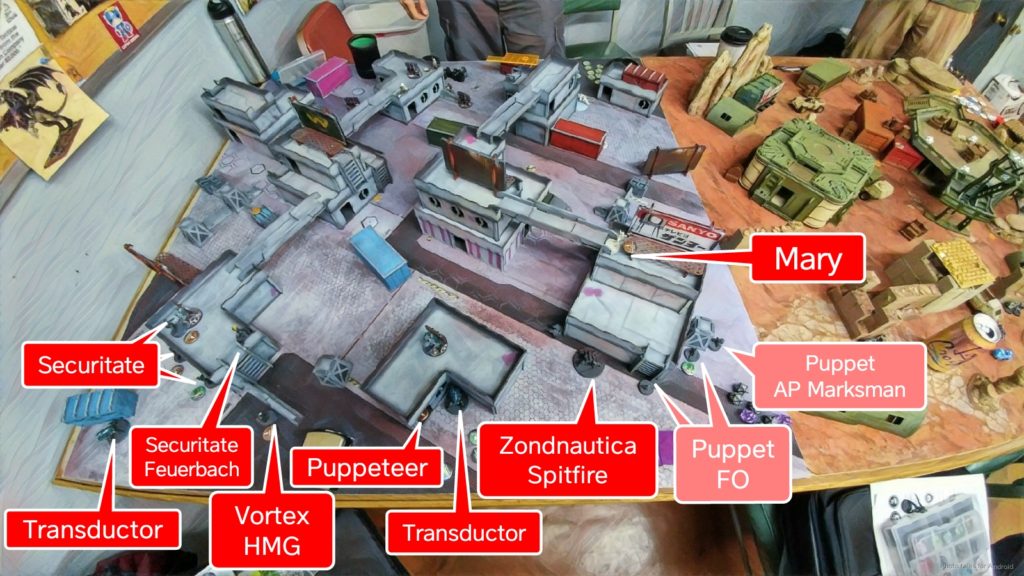
I’ve marked the five coins in yellow in this photo, so you have a reference for where they started. The 5 coin is on the left with the 4 coin on the roof in the center. The others are 2’s and 3’s, I forget which was which. Standard deployment for me. Link in the middle, specialists protected, guns forward with the ML prone in case something was pinning their movement. Ryuken on both sides, with the Shikami on the right and the Aragoto on the left. The Ninja went on the roof to snag the 4 coin.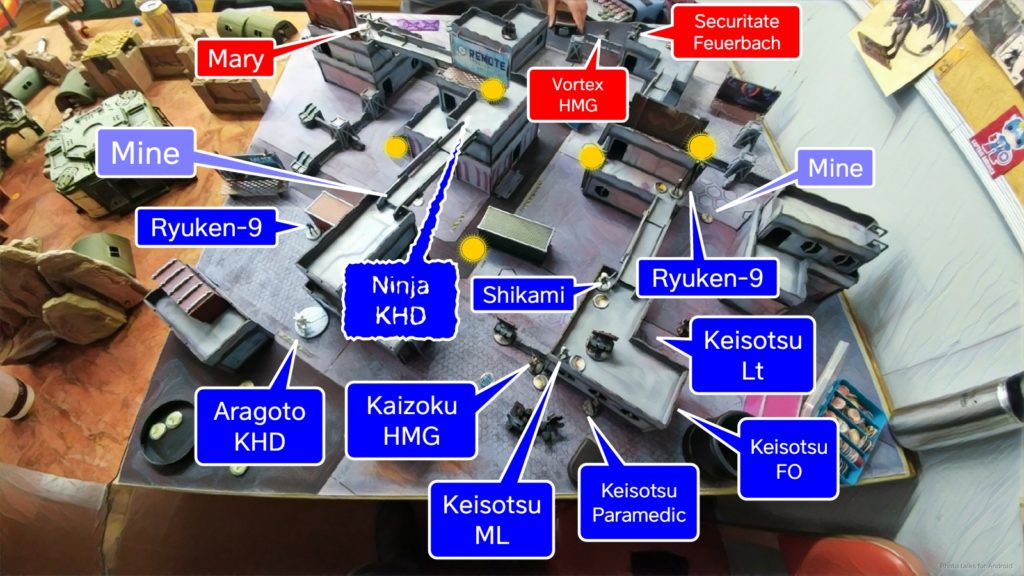 Birman castled up his Securitate link in the left corner, protected by a Transductor just in case. The Feuerbach was left out to ARO. The center of his deployment was his Puppeteer, also protected by a Transductor, with the Puppet “Haris” on the right. Mary was on the roof to go after the 4 coin herself.
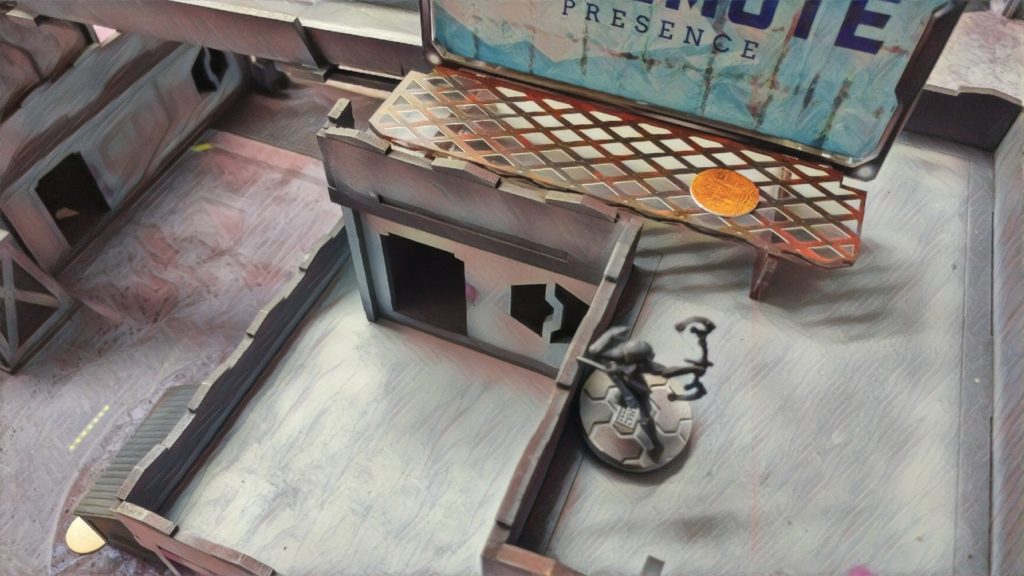
 After I hid my Ninja on the roof out of reserve, Birman dropped a Zondnautica Spitfire behind a building on the right.
Turn 1
Top of 1 – JSA
There’s always a bad luck game in a tournament, and this one was it. I started things off by trying to take one of Birman’s puppet bots from just inside 24″. I had hoped to be outside of 24, which would have zeroed out the puppet, but I got crit off the table instead.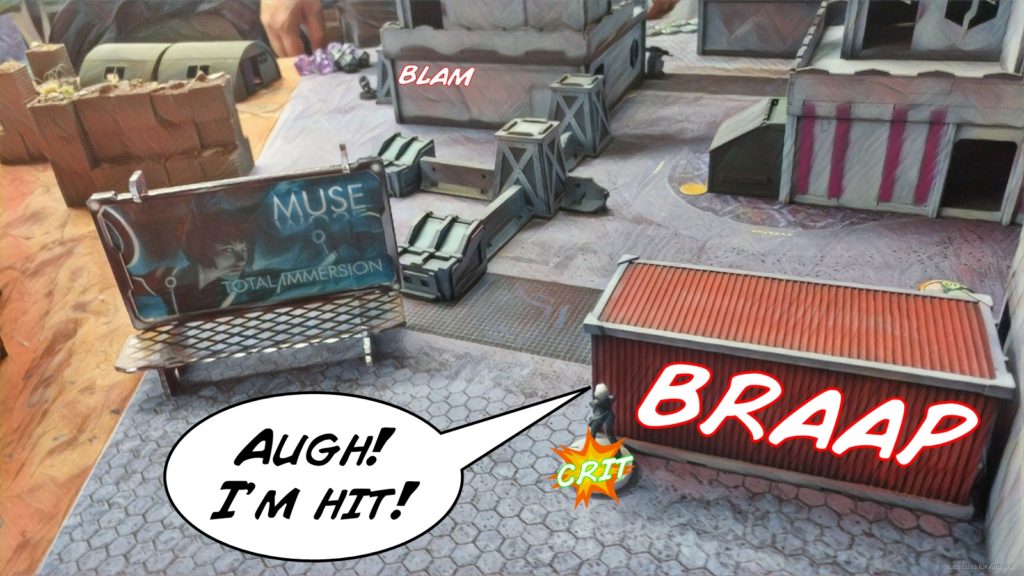 I moved my Mimetism HMG Kaizoku up to take out the Securitate Feuerbach, and got crit off the table again after spending an order of both of us whiffing.
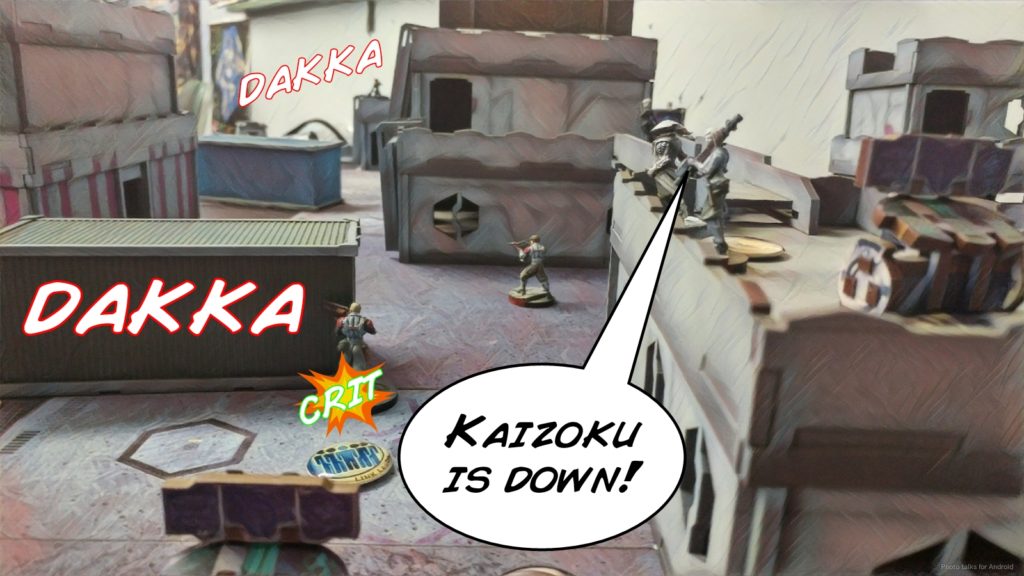 I gave up trying to do fancy things and just grabbed coins. I snagged a 2, a 3, and a 4 coin before passing the turn. Sadly, due to some bad planning I had my Shikami advanced and standing.
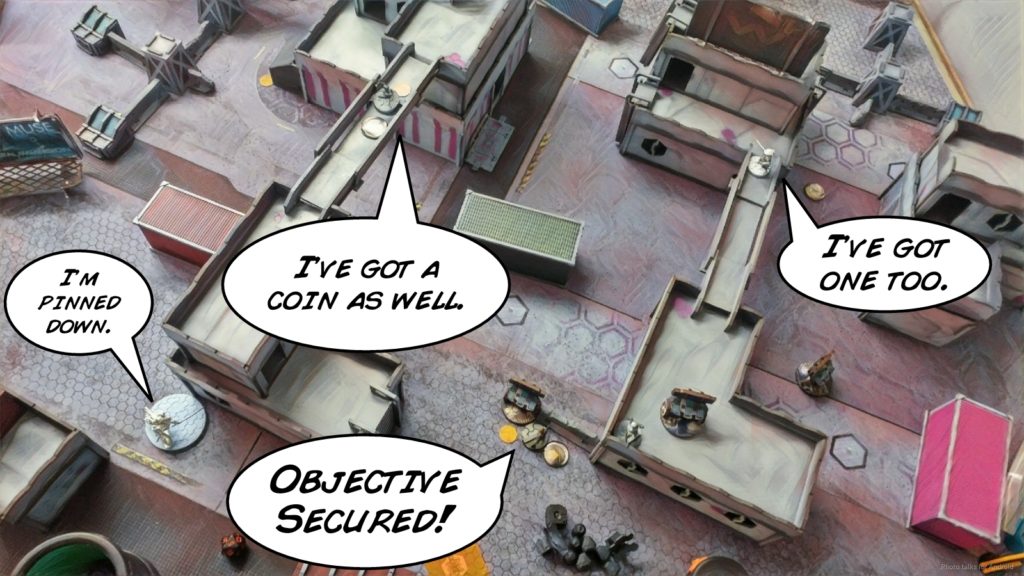 I managed to retreat enough elements to my deployment zone to reform a 3-man Keisotsu link with the ML before passing the turn, having done absolutely no damage.
Bottom of 1 – Tunguska
The Zondnautica advances and keeps as far back as possible on its regular order to try and avoid my left Ryuken’s mine while trying to take out the Keisotsu ML. Fortunately for me, that’s not far enough, and between missiles and mines the Zondnautica is off the table.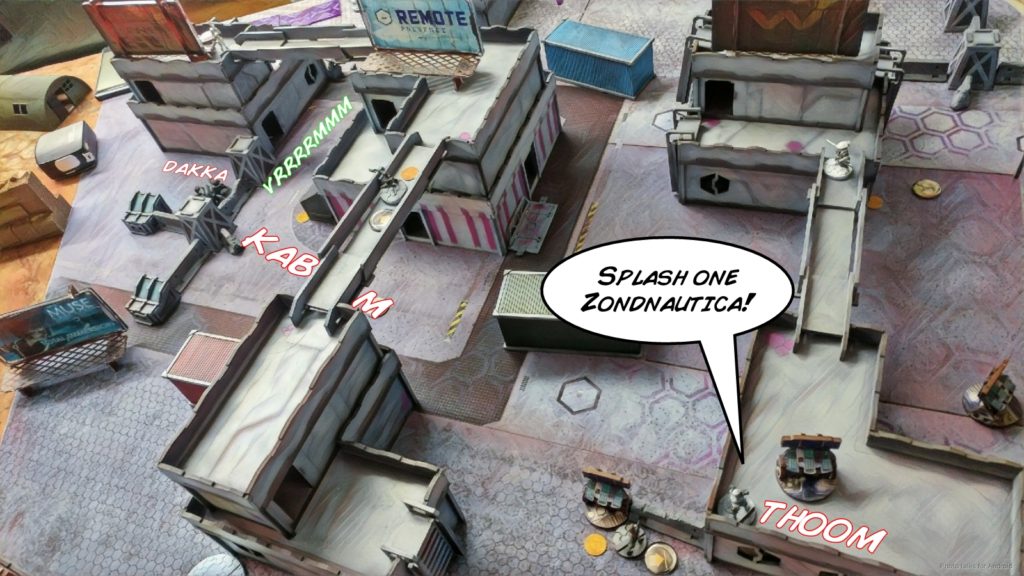 The Securitate link advance, and my Shikami successfully dodges most of the his Vortex Mimetism HMG’s shots, tanking the one that makes it through and going prone.
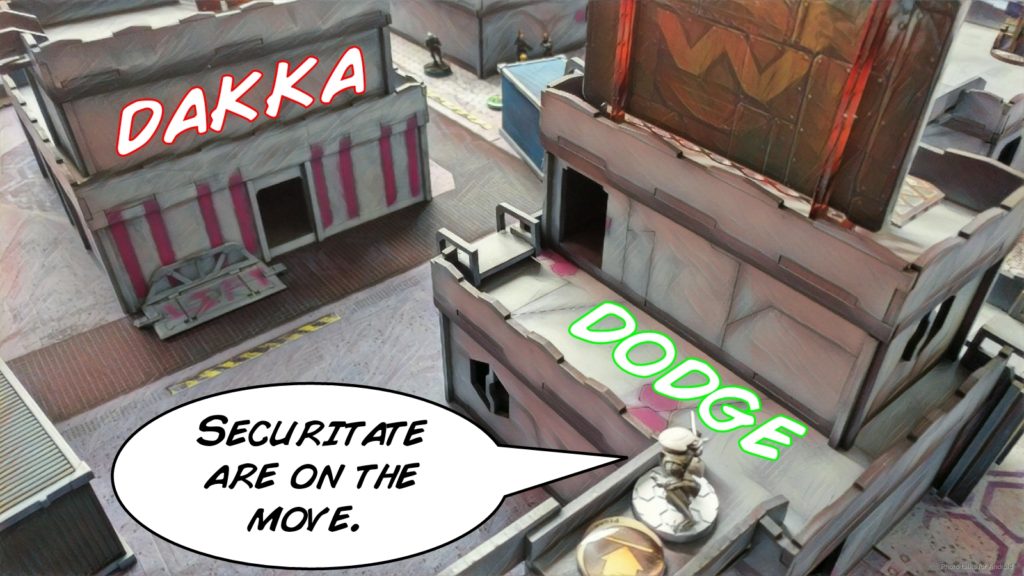 This does let the Spec Ops see my Keisotsu ML on the next order, and I lose it to a hail of HMG fire. The Puppets advance on my left, and my Aragato, who was sort of left out to dry by the Ryuken’s earlier failure to kill the AP Marksman Puppet, manages to suck 3 orders and a wound out of the Puppets before going down.
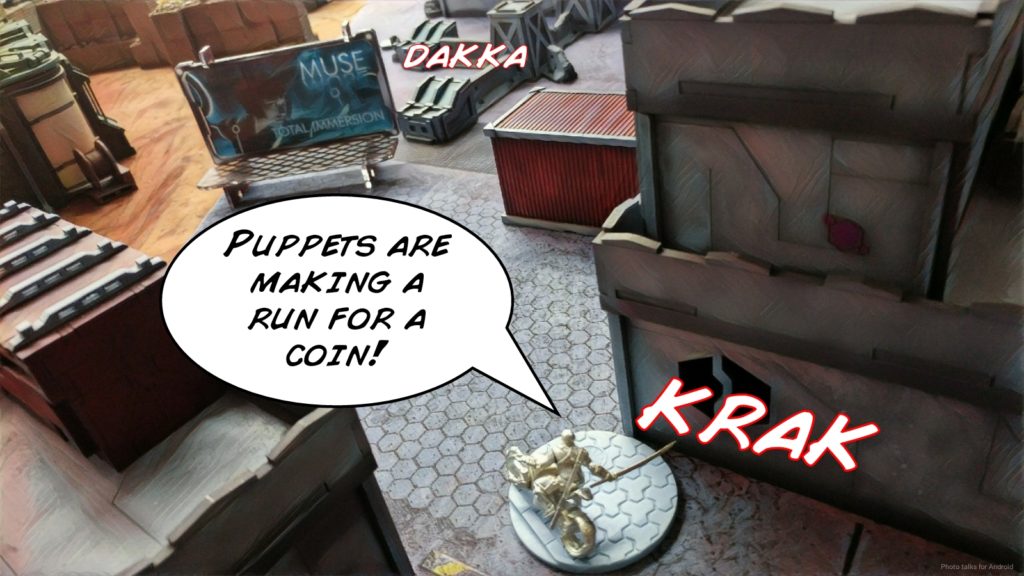 With all the orders it took to reposition both links, Birman is forced to pass the turn with me a bit worse for wear.
Turn 2
Top of 2 – JSA
Birman’s left the Feuerbach out to ARO against me, so I decide to try out the Shikami Nimbus and Assault Pistol trick on it. Sadly, I’m outside of 8″ and can’t get closer or I’ll see more models, so I’m stuck at that range. I’ve got almost a 40% chance to win versus the Securitate’s 7%, and of course get crit in the face again.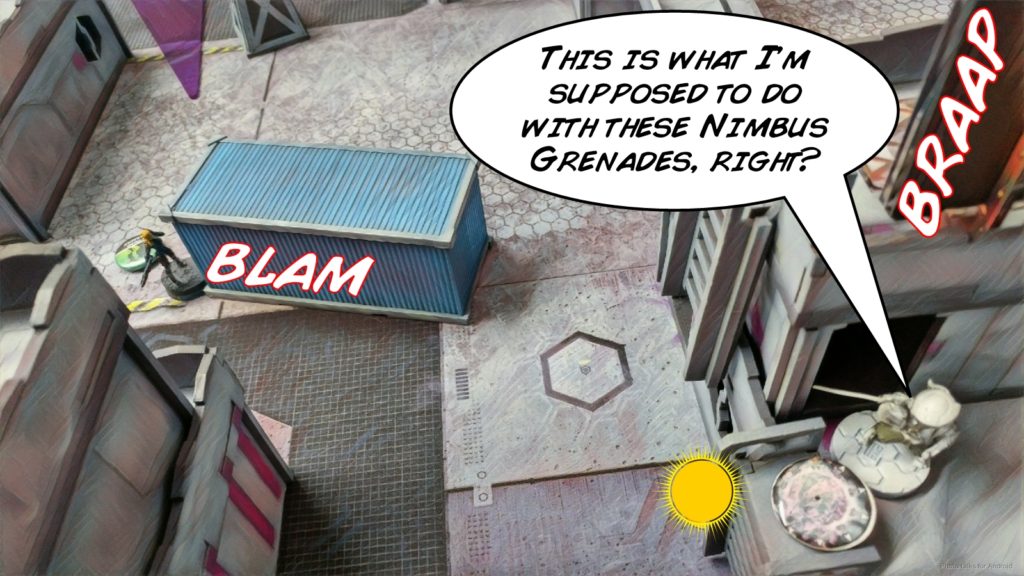 Thankfully, I pass the remaining two saves against EXP and attempt another time. This time the Securitate dodges away. I’m really low on orders so I grab the coin below the Shikami, which is the other 2 coin, and then dash the Ninja as far as I can away from Mary and hide the Shikami and its coin in the second story of the building he started on.
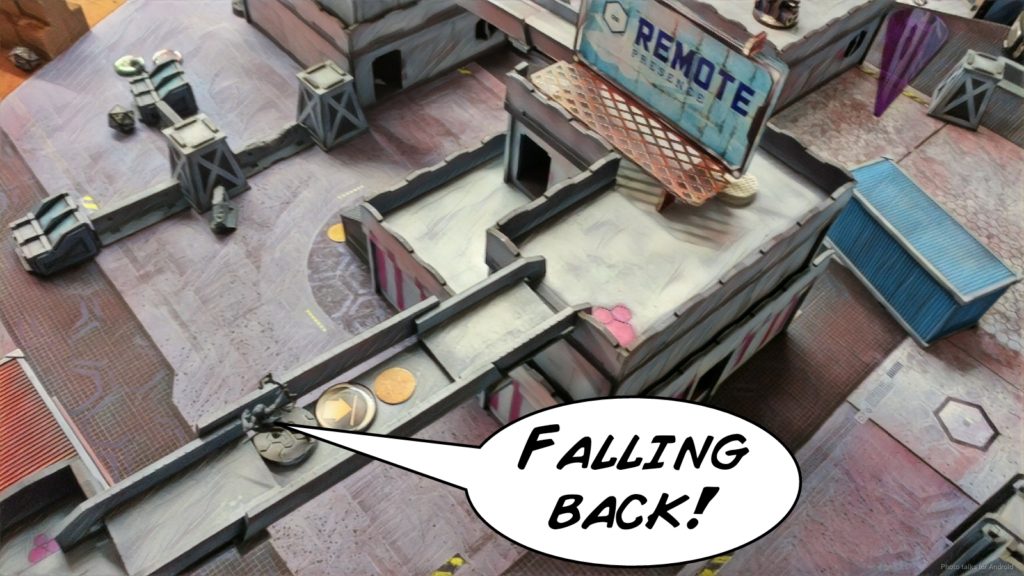
Bottom of 2 – Tunguska
Birman crits my Ninja with Mary’s SMG, and then has a bit of bad luck himself trying to land two pitchers next to my Shikami, whiffing both.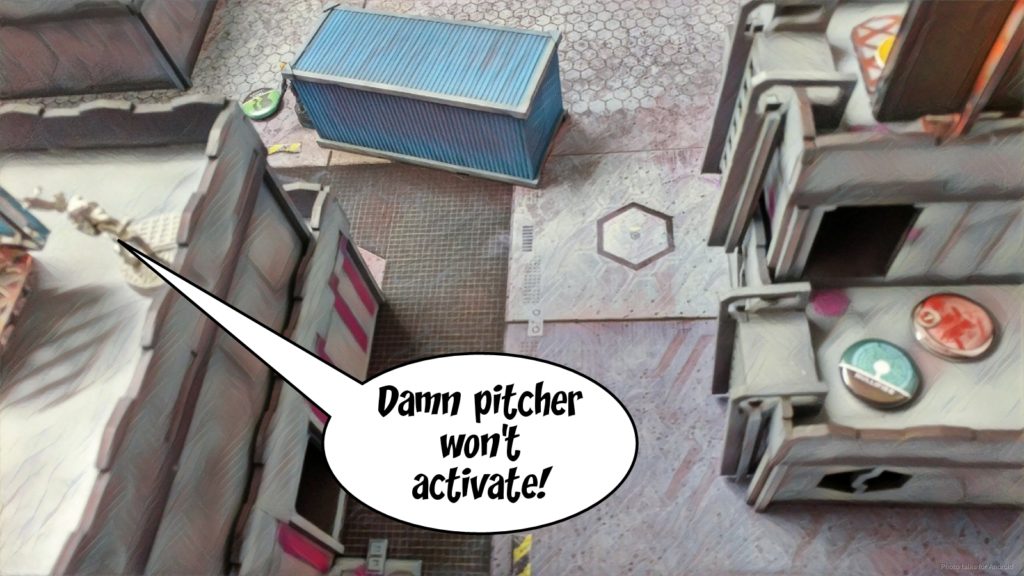 He settles for advancing towards the Ninja’s 4 coin, prone, and grabbing the remaining unclaimed coin on the left, which I know is a 5, with his Puppets.
Turn 3
Top of 3 – JSA
I know that if Mary grabs the Ninja’s coin it’s game for me, so I do my best to kill her. All I’ve got is the Shikami, and I can’t get anywhere near her hacking or her Zapper, so I do A LOT of fancy parkour, climbing all the way up the building and the billboard on top of it then jumping up to see Mary’s base. I get two shots at this before she Hyper-Dynamics her way out of any possible LoF, and I’m down to a single order.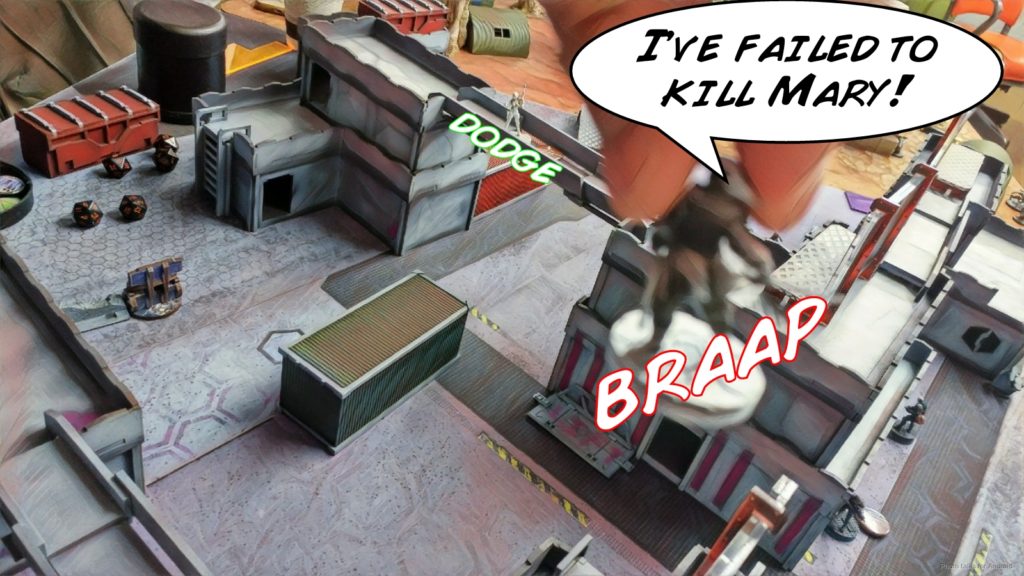 I settle for a Lieutenant snipe. The combi-toting Securitate that isn’t corner guarding is probably a Lieutenant, right? I chose correctly and my Ryuken drops it with a shock crit.
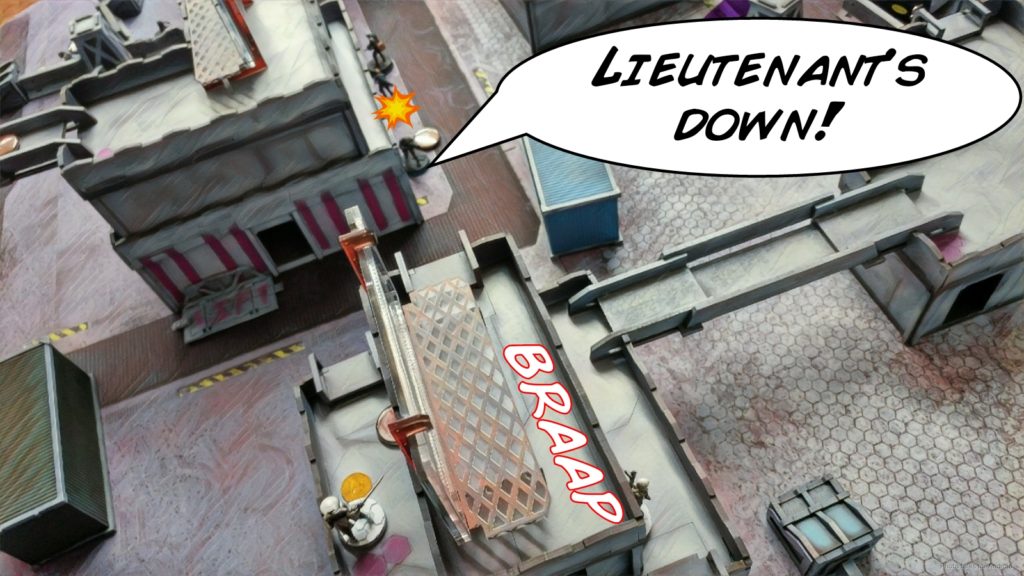
Bottom of 3 – Tunguska
Birman’s in Loss of Lieutenant, but it doesn’t matter. Mary just picks up the 4 coin and then we work together to get him some points for his in-game achievements. Thanks to having both high value coins to my 3 low value coins, it’s a
9-7 Jurisdictional Command of Tunguska Victory!
Notes
Notes for Me
- I didn’t really need to go after the Securitate Feuerbach. Could’ve just run a subset of the link up to grab objectives and then retreated and reformed the link at 5-man.
- Also probably didn’t need to go after the puppets, and should’ve spent the orders getting my Ninja away from Mary. Pulling everything back and forcing them to come to me would’ve been okay.
- I had thought about using the Ryuken to go after the Securitate, the only problem was I wasn’t sure if I would’ve been inside 16″ or not. If I’m out of 16″ the odds start to look pretty bad.
- Definitely needed to abuse the Ryuken in suppression more, and I really didn’t have a strong option for dealing with Mary.
- Talking to Birman after the game, he thought that if I had jumped my Shikami across the platform and gone after Mary with an assault pistol he probably would’ve tried to F2F me instead of zappering, but that’s still 17’s on Carbonite versus 9’s on the assault pistol in 8″. Outside of 8, it’s 4 on 6’s versus 1 on 5’s or 1 on 13’s… both are bad. In any case, he thought that he probably would’ve gone for dice and not a DTW. Worth thinking about some more, and would’ve saved me the orders I spent on parkour.
Notes for Birman
- Probably worth using Zondnautica’s smoke to block LoF to my ML, then use the puppets or the Zondmate to clear the mine. Then at least you’d still have the order and the Zondnaut alive.
- I dig the Puppets, but I see too many Speculos out of Adam/Than to feel comfortable running them on the regular. They do work though, as you proved.
- I’m a little surprised that you didn’t have a Paramedic in the Securitate link, just to have a specialist there, but it ended up working out fine.
- Mary is such a PITA. Usually I don’t have much trouble dealing with her, but without a good source of DTW I had some trouble.
- Good game! I think you did a great job of out maneuvering me, and I certainly don’t think that I can point to the crits as the reason I lost the game. I over-extended and you exploited it.
- Looking forward to a rematch!
Game 4 – E/M Fastball
 Game four was versus Evan, who was rocking Military Orders. We ended up playing on Adam’s USA table, which is always a good time. After the dismal performance of the Ryuken last game, I wanted some good old fashioned Karakuri face-punching action, so I took my first list against this Biotechvore nonsense.
Overview
- Mission: Kill Box
- This scenario is a variation of Biotechvore.
- At the end of each game turn, nano clouds expands six inches from all four sides of the table. After turn two, the clouds has expanded 12 inches into the board. After turn three, the affected area is up to 18 inches into the table.
- The cloud acts as a Low Visibility zone.
- Models caught in the nano cloud at the end of the turn suffer a Damage 13 wound using the viral special ammunition rule.
- At the end of the game, have more points alive on the table than your opponent.
- Forces: Japanese Secessionist Army versus Military Orders
- Deploy First: JSA
- First Turn: JSA
[img]https://assets.infinitythegame.net/infinityarmy/img/_logosweb/logo_903.png[/img][b] Raindog A[/b]
[img]https://assets.infinitythegame.net/infinityarmy/img/_logosweb/903/logo_1.png[/img] [b]KEISOTSU Lieutenant[/b] Combi Rifle / Pistol, Knife. (1 | [b]9[/b])
[img]https://assets.infinitythegame.net/infinityarmy/img/_logosweb/903/logo_1.png[/img] [b]KEISOTSU[/b] HMG / Pistol, Knife. (1 | [b]17[/b])
[img]https://assets.infinitythegame.net/infinityarmy/img/_logosweb/903/logo_1.png[/img] [b]KEISOTSU Paramedic (MediKit)[/b] Combi Rifle / Pistol, Knife. (0 | [b]11[/b])
[img]https://assets.infinitythegame.net/infinityarmy/img/_logosweb/903/logo_1.png[/img] [b]KEISOTSU[/b] Missile Launcher / Pistol, Knife. (1.5 | [b]14[/b])
[img]https://assets.infinitythegame.net/infinityarmy/img/_logosweb/903/logo_5.png[/img] [b]DOMARU[/b] Chain Rifle, E/M Grenades / Pistol, E/M CCW, Shock CC Weapon. (0 | [b]26[/b])
[img]https://assets.infinitythegame.net/infinityarmy/img/_logosweb/903/logo_2.png[/img] [b]KEMPEI (Chain of Command)[/b] Combi Rifle / Pistol, CCW, Electric Pulse. (0 | [b]22[/b])[img]https://assets.infinitythegame.net/infinityarmy/img/_logosweb/903/logo_7.png[/img] [b]KARAKURI[/b] Heavy Shotgun, Chain Rifle, D.E.P. / Pistol, Knife. (0 | [b]35[/b])
[img]https://assets.infinitythegame.net/infinityarmy/img/_logosweb/903/logo_7.png[/img] [b]KARAKURI[/b] Combi Rifle, Chain Rifle, D.E.P. / Pistol, Knife. (0 | [b]35[/b])
[img]https://assets.infinitythegame.net/infinityarmy/img/_logosweb/903/logo_1000.png[/img] [b]KAIZOKU Spec-Ops (12 XP)[/b] [i](Infiltration, Minelayer, Engineer)[/i] Combi Rifle / Pistol, Knife. (0 | [b]9[/b])
[img]https://assets.infinitythegame.net/infinityarmy/img/_logosweb/903/logo_29.png[/img] [b]YOJIMBO[/b] Contender, Nanopulser, Smoke Grenades, CrazyKoalas (2) / Pistol, DA CCW. (0 | [b]21[/b])
[img]https://assets.infinitythegame.net/infinityarmy/img/logos/orden_regular.png[/img]9 [img]https://assets.infinitythegame.net/infinityarmy/img/logos/orden_irregular.png[/img]1 [img]https://assets.infinitythegame.net/infinityarmy/img/logos/orden_impetuosa.png[/img]1 [b]| 3.5 SWC | 199 Points |[/b] Open in Infinity Army
[img]https://assets.infinitythegame.net/infinityarmy/img/_logosweb/logo_103.png[/img][b] Military Orders[/b]
[img]https://assets.infinitythegame.net/infinityarmy/img/_logosweb/103/logo_5.png[/img] [b]KNIGHT OF SANTIAGO Lieutenant (Specialist Operative)[/b] Spitfire, Nanopulser, E/M Grenades, D-Charges / Pistol, DA CCW. (1 | [b]43[/b])
[img]https://assets.infinitythegame.net/infinityarmy/img/_logosweb/103/logo_1000.png[/img] [b]INDIGO Spec-Ops (10 XP)[/b] [i](Doctor, Minelayer)[/i] Combi Rifle, MULTI Sniper / Pistol, Knife. (0 | [b]13[/b])
[img]https://assets.infinitythegame.net/infinityarmy/img/_logosweb/103/logo_2.png[/img] [b]ORDER SERGEANT Paramedic (MediKit)[/b] Combi Rifle / Pistol, Knife. (0 | [b]15[/b])
[img]https://assets.infinitythegame.net/infinityarmy/img/_logosweb/103/logo_2.png[/img] [b]ORDER SERGEANT[/b] Heavy Rocket Launcher / Assault Pistol, Knife. (1.5 | [b]15[/b])
[img]https://assets.infinitythegame.net/infinityarmy/img/_logosweb/103/logo_5.png[/img] [b]KNIGHT OF SANTIAGO Hacker (Killer Hacking Device)[/b] Combi Rifle, Nanopulser, D-Charges + 1 TinBot A (Deflector L1) / Pistol, DA CCW. (0 | [b]38[/b])[img]https://assets.infinitythegame.net/infinityarmy/img/_logosweb/103/logo_21.png[/img] [b]MACHINIST (Father-Engineer)[/b] Combi Rifle, D-Charges / Pistol, Knife. (0 | [b]15[/b])
[img]https://assets.infinitythegame.net/infinityarmy/img/_logosweb/103/logo_20.png[/img] [b]TRAUMA-DOC (Father-Doctor)[/b] Combi Rifle / Pistol, Knife. (0 | [b]14[/b])
[img]https://assets.infinitythegame.net/infinityarmy/img/_logosweb/103/logo_16.png[/img] [b]BULLETEER[/b] Spitfire / Electric Pulse. (1 | [b]23[/b])
[img]https://assets.infinitythegame.net/infinityarmy/img/_logosweb/103/logo_15.png[/img] [b]FUGAZI DRONBOT[/b] Flash Pulse, Sniffer / Electric Pulse. (0 | [b]8[/b])
[img]https://assets.infinitythegame.net/infinityarmy/img/_logosweb/103/logo_12.png[/img] [b]PATHFINDER DRONBOT[/b] Combi Rifle, Sniffer / Electric Pulse. (0 | [b]16[/b])
[img]https://assets.infinitythegame.net/infinityarmy/img/logos/orden_regular.png[/img]10 [b]| 3.5 SWC | 200 Points |[/b] Open in Infinity Army
Deployment
I went first, again, and carefully placed most of my stuff such that I wouldn’t have to move most of it during my first turn if I didn’t want to. Notable exceptions included my Keisotsu Paramedic, my Karakuri combi, and my Kempetai. I put the Kaizoku up in the middle with a mine in the central approach, and left my ML prone so I could shuffle guys around without worrying about granting a free ARO. I held the Karakuri shotgun in reserve to see where he’d place his link.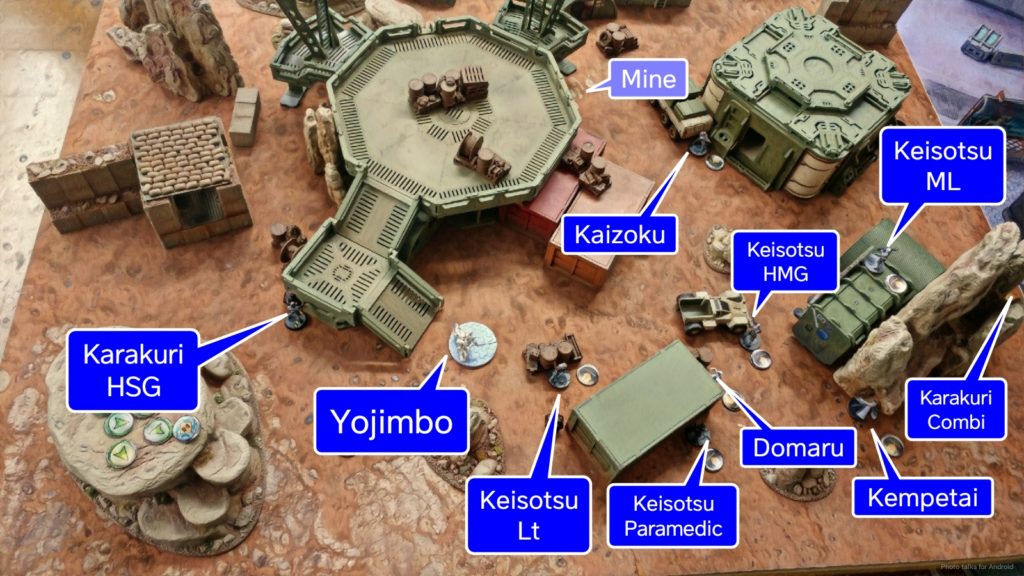 Evan tucked his link into a rock formation, with the HRL and his Indigo MSR left out to ARO. He put a Pathfinder on the right and his Bulleteer on the left, with another doctor near the link and a engineer near the Bulleteer. His Fugazi went on the left to screen the approach to his vulnerable Bulleteer too.
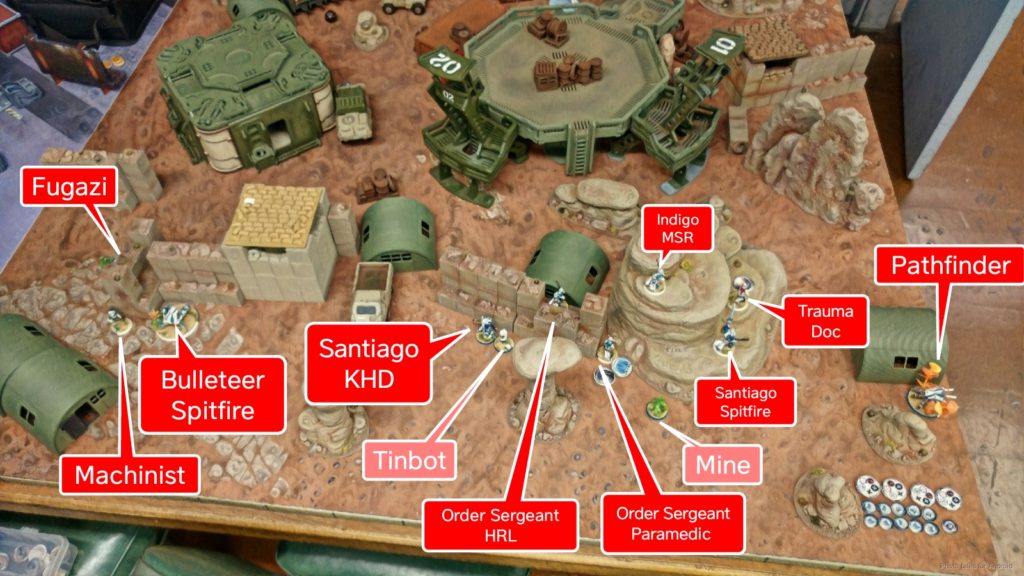 I put the Karakuri shotgun on the same side of the link to go break it, and the Bulleteer was Evan’s reserve.
Turn 1
Top of 1 – JSA
I managed to get the Karakuri up the board after Yojimbo scooted forward. A quick flash pulse forced the Trauma-Doc back with a dodge, and then I shotgunned down the Order Sergeant HRL after threading the needle through the LoF shadow left by the missing Trauma-Doc.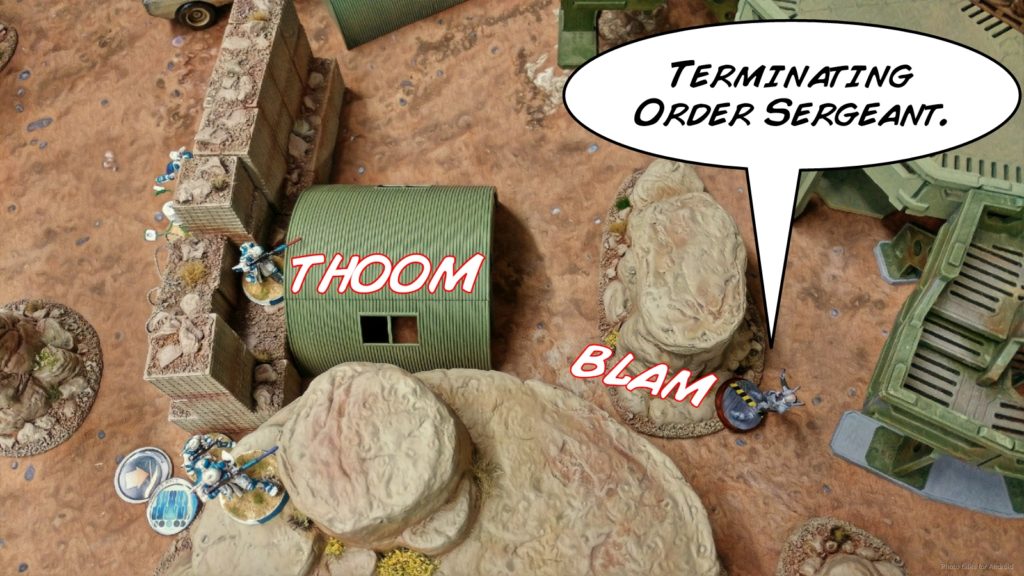 I then scooted into position to shotgun the Santiago Spitfire, who fastballed two crit E/M grenades in my face, which was lucky because I rolled an 18.
 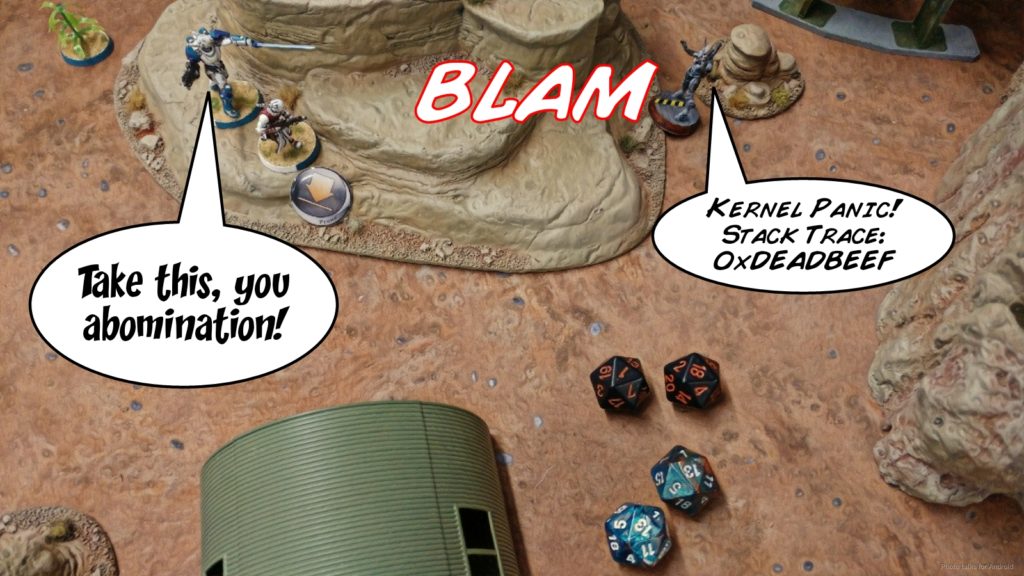 Yojimbo had put down some smoke to free up my link to move on his impetuous order, so I shuffled everyone forward and stood up the ML to trade for a few orders (hopefully) from Evan, and scooted my Karakuri Combi up the board as well.
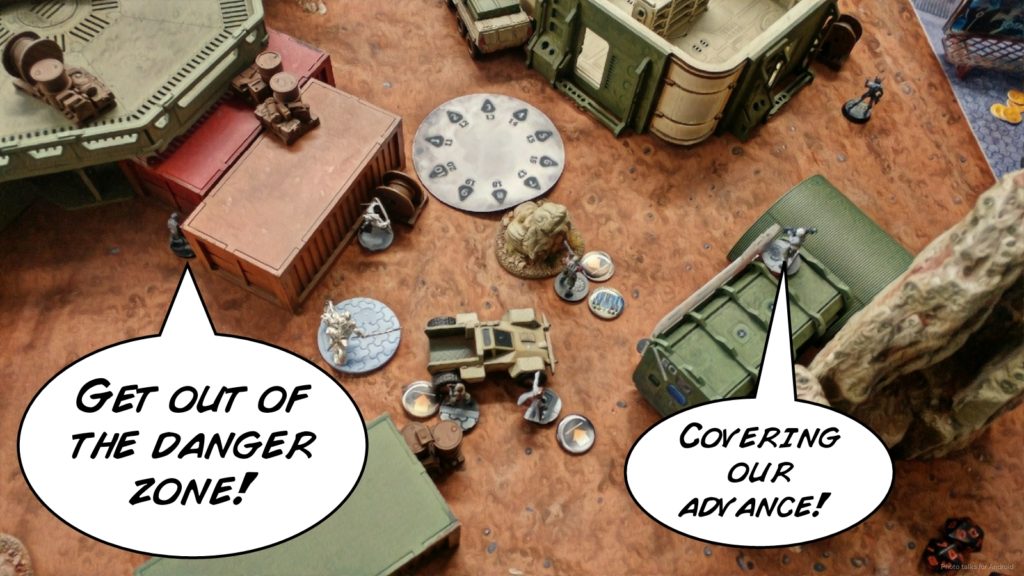 I wanted to get rid of some more orders, so I went after the Fugazi with my Kaizoku, taking it out easily.
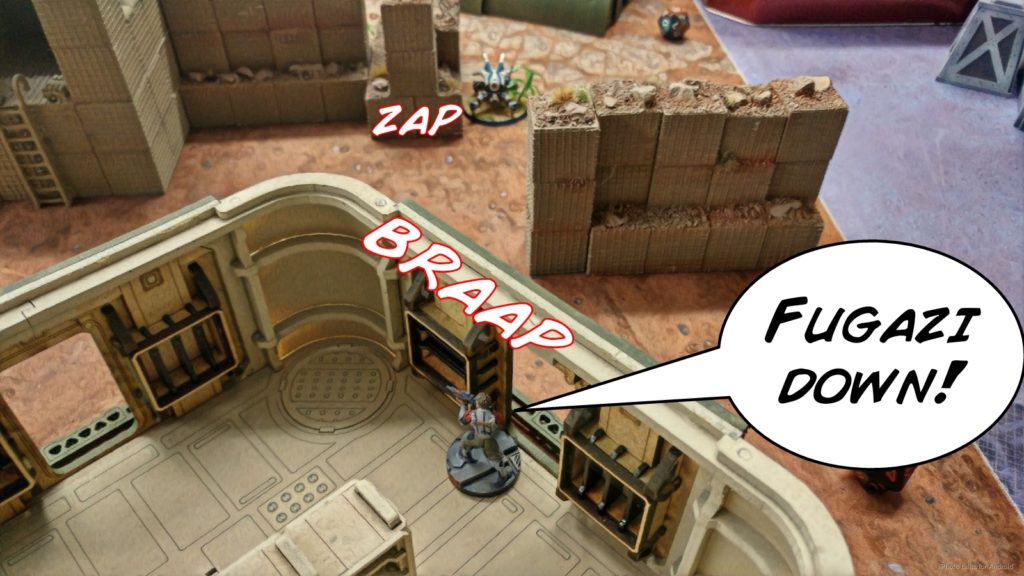 I ended my turn by tucking the Karakuri Combi into the objective room, and shuffling Yojimbo to behind the objective room.
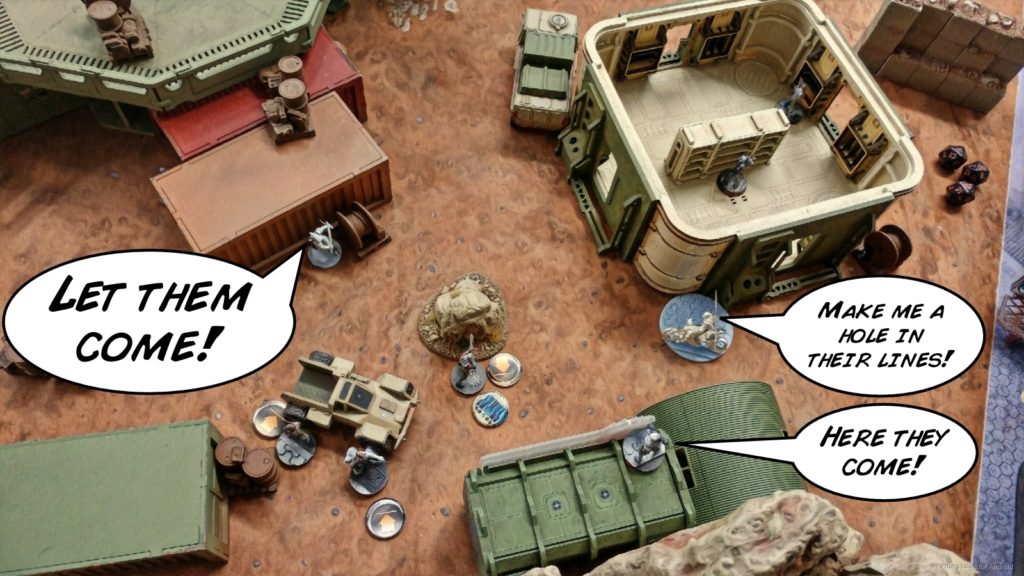
Bottom of 1 – Military Orders
I’ve managed to get rid of the link’s +3 bonus, but PanO BS doesn’t care and the Indigo MSR shot my Kempetai ML off the table with I think a crit and two hits.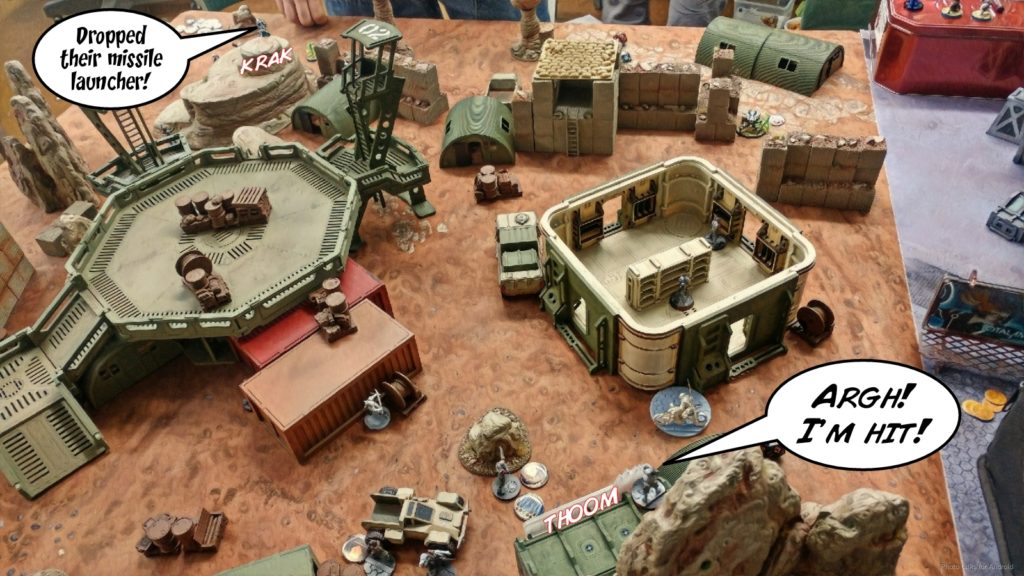 The Bulleteer pushed forward, gunning down my Spec Ops, but not before I dropped a mine in response.
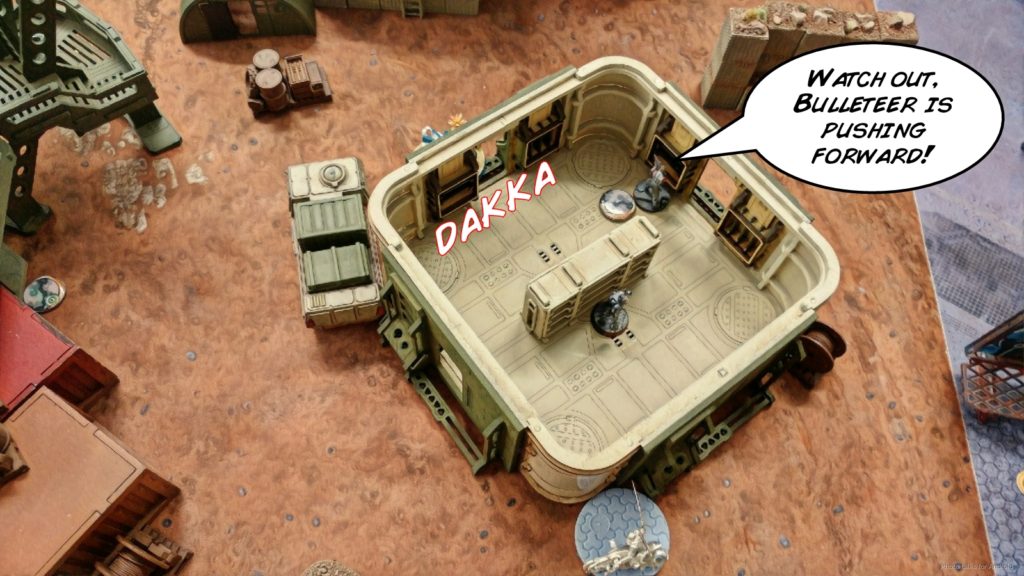 It moved again, attempting a dodge. It failed the dodge but passed both ARM saves. UGH.
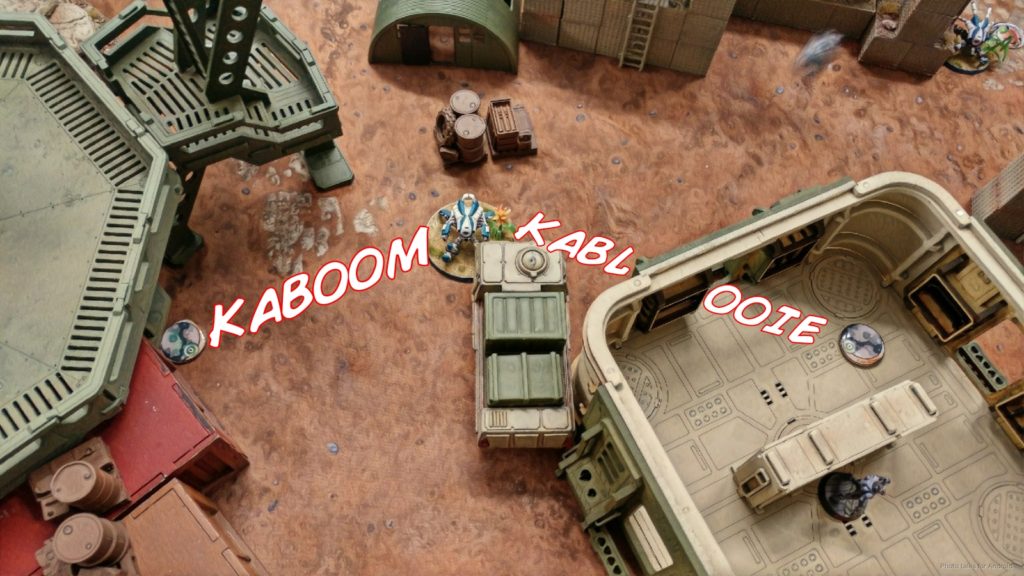 The Pathfinder scooted forward to get out of the danger zone, and then Evan passed turn back to me after throwing the Bulleteer into suppression.
Turn 2
Everything was out of the danger zone for both of us, so no rolls required.
Top of 2 – JSA
I waffled a bunch on whether or not to use Yojimbo’s order, and ended up doing it. As I write this I’m a little miffed that I forgot about the Koalas ,which would’ve definitely helped against the Bulleteer. Ah well. Anyway, I nanopulsar the Bulleeter, who tanks the hit and does a wound to Yojimbo.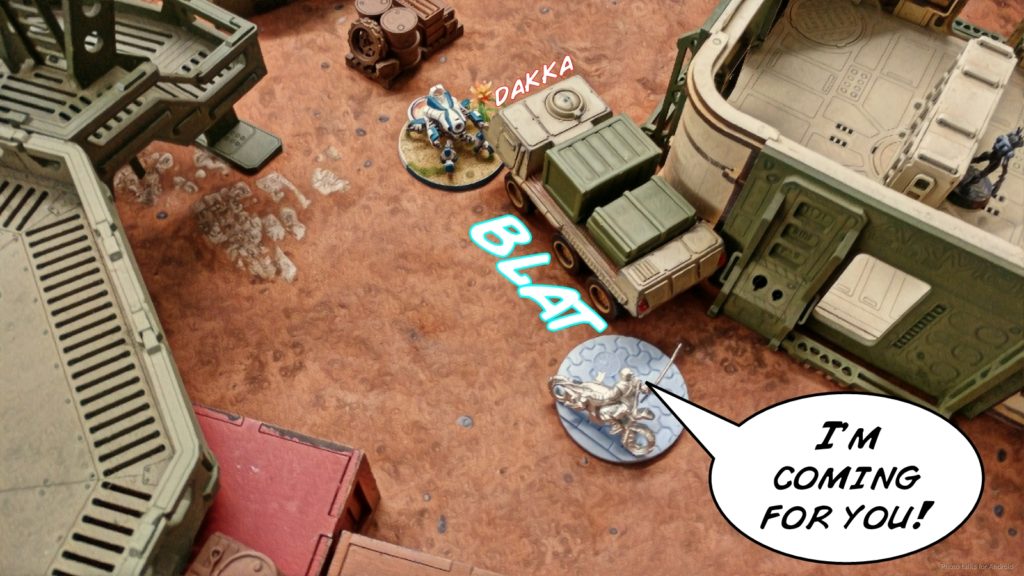 Obadiah (Nehimiah) had informed me that rolling Yojimbo into combat with a suppressing model works, so I put his field data to the test. Obi knows what he’s doing, so Yojimbo took care of the pesky Bulleteer problem for me, but the Indigo MSR picked him off.
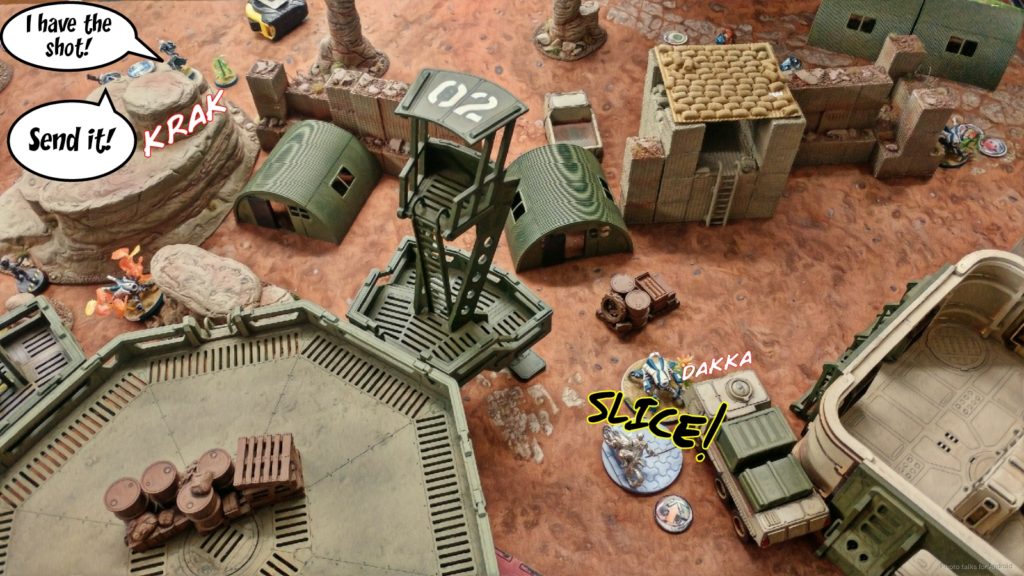 With the Keisotsu ML dead, I reformed the link with the Keisotsu Lt to bring it back up to 5 members, and then trucked it up the board to attempt and remove the Indigo. Unfortunately, I was within 16″, and to make matters worse, I was crit down.
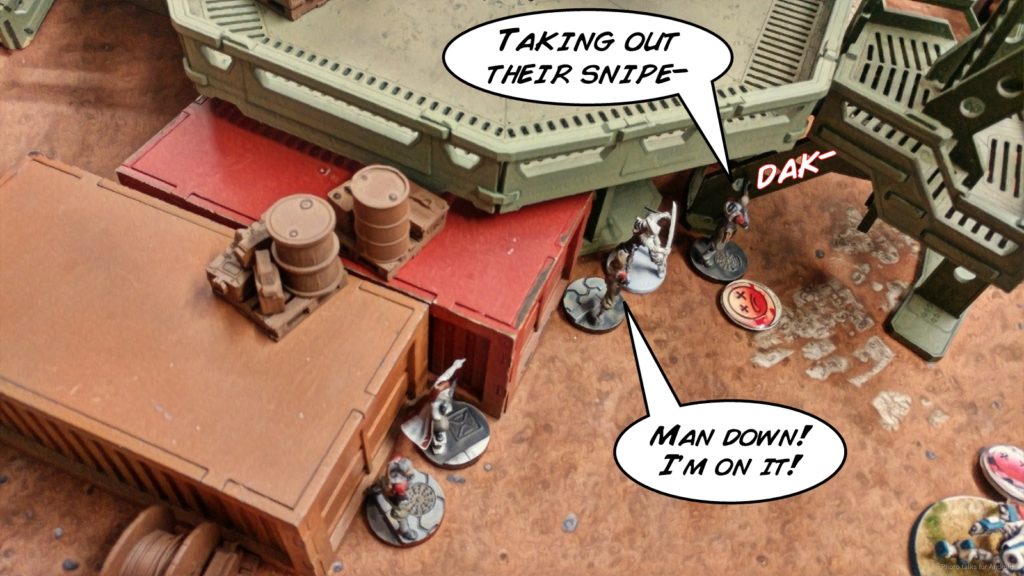 I attempted to pick him back up with the Paramedic, but ended up killing him. Sighing, I reformed the link and sent in the Kempetai, since I knew the range was just inside 16″. That did the trick and it was my turn to crit the Indigo down.
 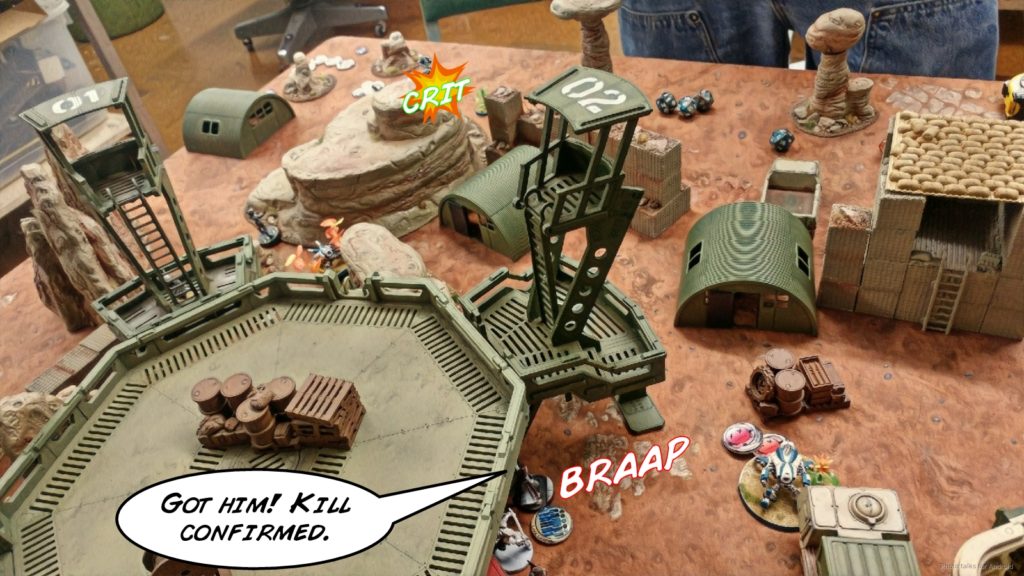 The Pathfinder was in the way, so I threw the Domaru out in the open to distract it, and it took a shot at the HI, granting me a normal roll on the Kempetai, who finished off the bot with little difficulty.
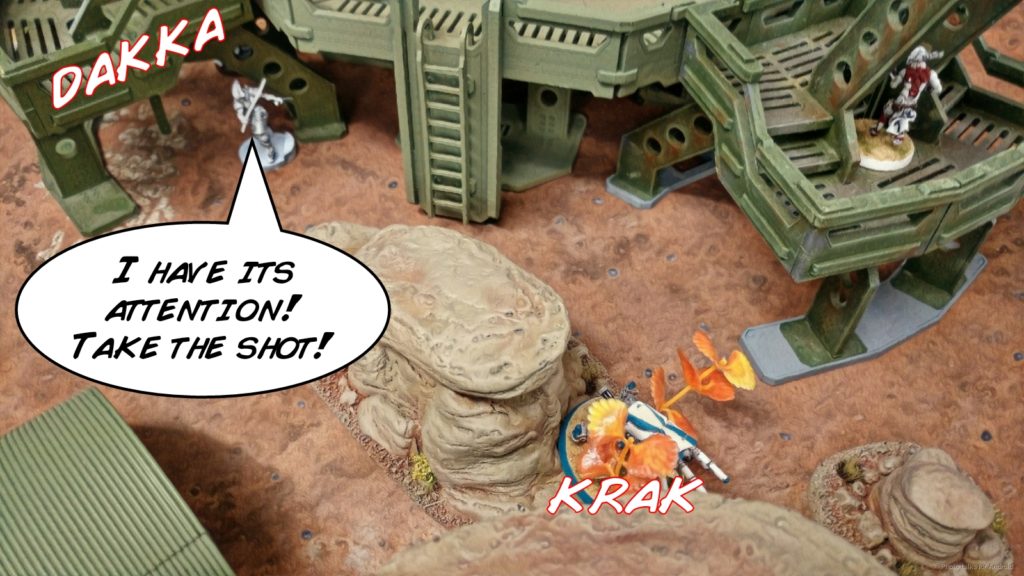 I moved the link into cover, pushing the Domaru forward to screen the link from the approaching Santiagos, then left the Kempetai and Paramedic out to delay anything else. This also let me retreat my Lieutenant and break him out of the link, pushing him back and away from danger.
Bottom of 2 – Military Orders
The Santiago Spitfire makes short work of the Kempetai, and then the Santiago comes to take on the Domaru…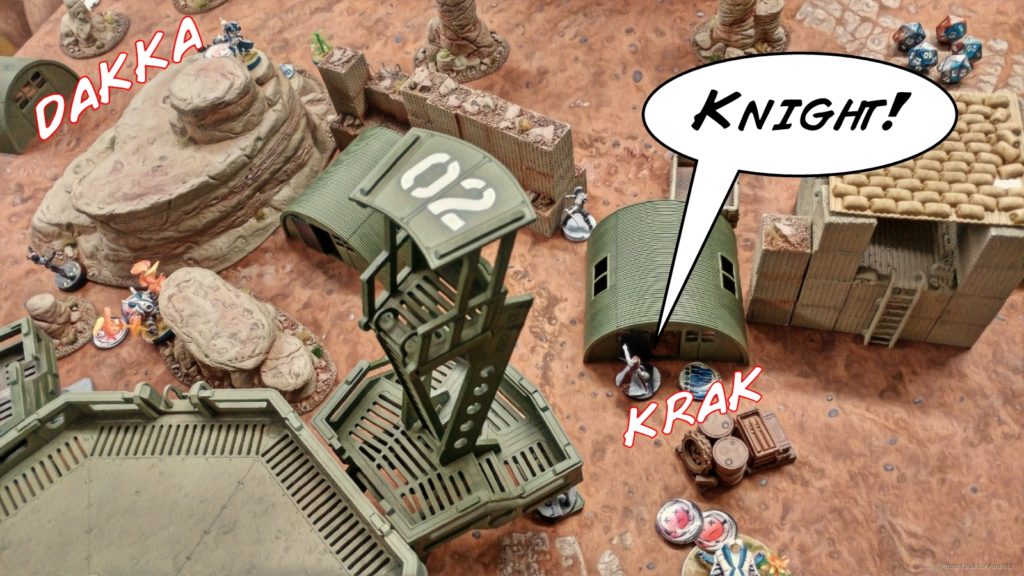 this time, it’s MY turn to fastball E/M grenade him, and I catch both Santiagos in the blast, Immobilizing and Isolating them both. The nearby Paramedic attempts to take out the Domaru, but fails and is chain-rifled down for his trouble.
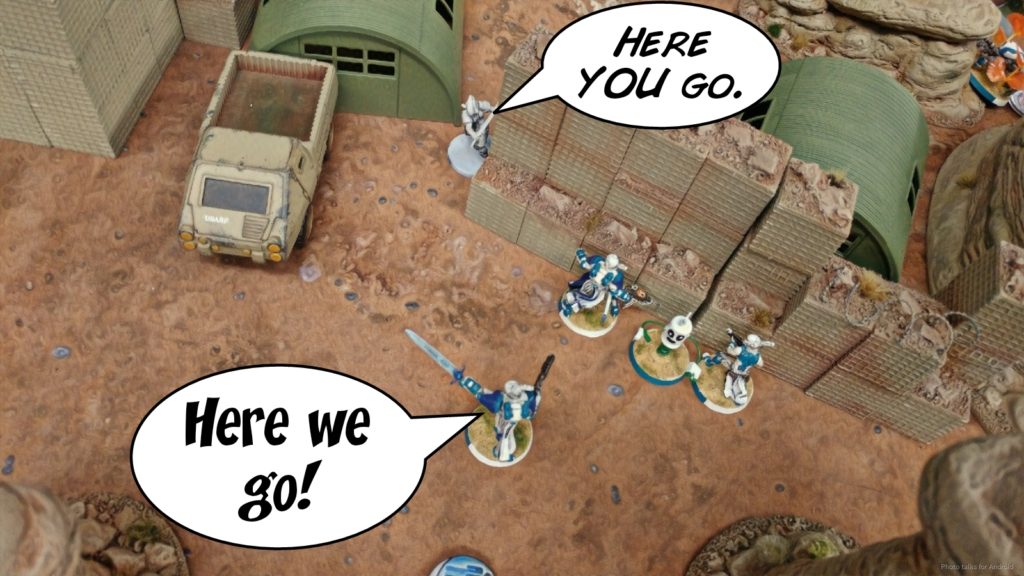 The Machinist succeeds at taking out my Keisotsu… and then it’s back to my turn.
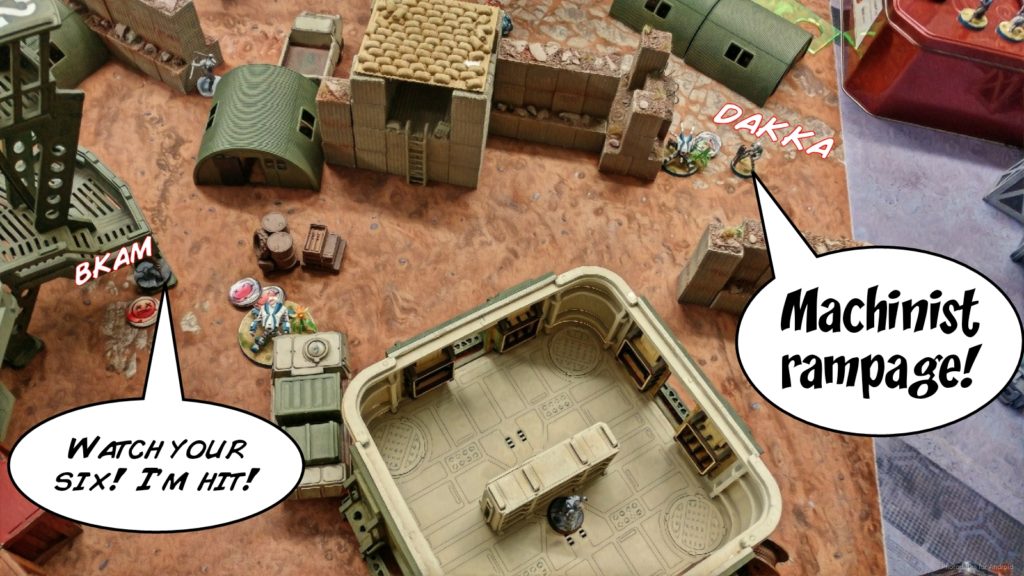
Turn 3
The Biotechvore zone kills the Trauma Doc, puts another wound on the Fugazi, and kills the Machinist. Both Santiagos take a wound too, with the Domaru and both Karakuri passing.
Top of 3 – JSA
I retreat my Domaru, taking a chain rifle shot at the two Santiagos, knocking out the Spitfire…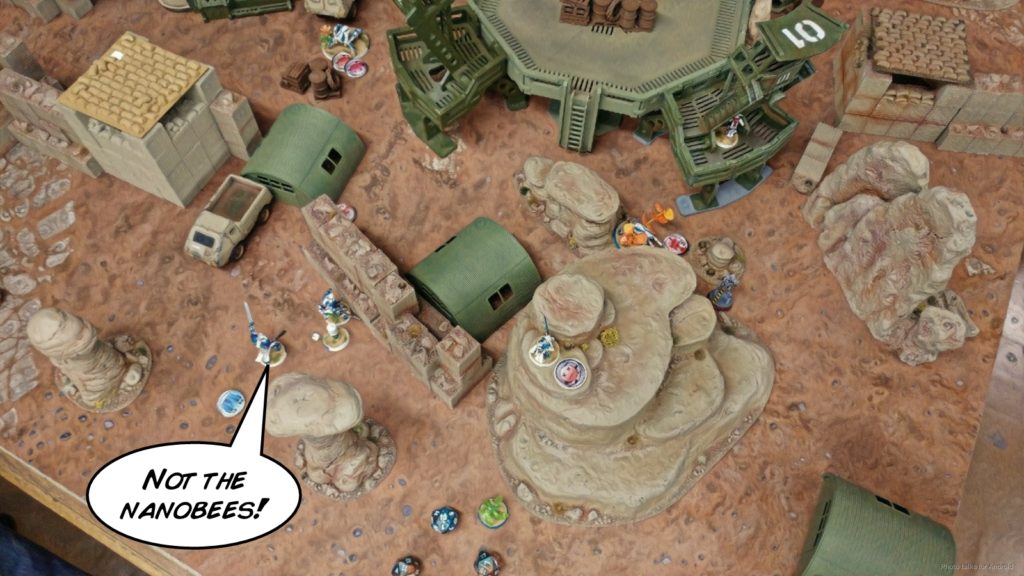 and I dash all my surviving, non-Immobilized models to the safe area and that’s that. The Biotechvore zone finishes off the remaining Santiago, which effectively tables Evan. My immobilized Karakuri survives the viral hits, so with two Karakuri, a Domaru, and a Keisotsu alive versus a pile of dead Knights, it’s a
Japanese Secessionist Army Victory!
Thanks to Evan for a great game, and a big thank you to Eric and Ordo for running a really great tournament for a good cause.
Notes
Notes for Me
- Most things went to plan. I think I should’ve put my infiltrating engineer Kaizoku on the left to support my Karakuri, but it was hard to anticipate everything.
- I was pretty pleased with the performance of my link, and still enjoy it as a Domaru delivery system.
- I think I may have misplayed the Kaizoku a little in going after the Fugazi. Perhaps the better option would’ve been to move the Karakuri combi up a bit further.
- Still getting used to impetuous bikes. They require a fair amount of finesse if you want the most use out of them.
Notes for Evan
- What a crit-filled game! At least it was on both sides.
- Great work using the E/M grenades on my murderous robots.
- I really liked your link, it was pretty rad. Passed it on to other folks in the Sherwood area to try out.
- Thanks for the game! Hope to see you across the table again soon!

